RainMachine has the ability to turn the first terminal (Zone 1) into a master valve/pump start relay switch. To do this, wire up your relay to Zone 1 on the RainMachine (with any common and the control wire into the no. 1 connector) and make sure it is firmly connected.
Note: The RainMachine Pro-8/16 have a dedicated Master Valve (pump) terminal that will not replace the Zone 1.
Enabling Master Valve
1) Directly on the RainMachine Touch HD-12/16 and Pro-8/16 screens):
Touch HD-12/16
Local UI Touch screen - Zones > Edit Zones > Zone 1 > Enable Master Valve.
Pro-8/16
Local UI Touch screen - Settings > Peripherals > Master Valve > Enable Master Valve.
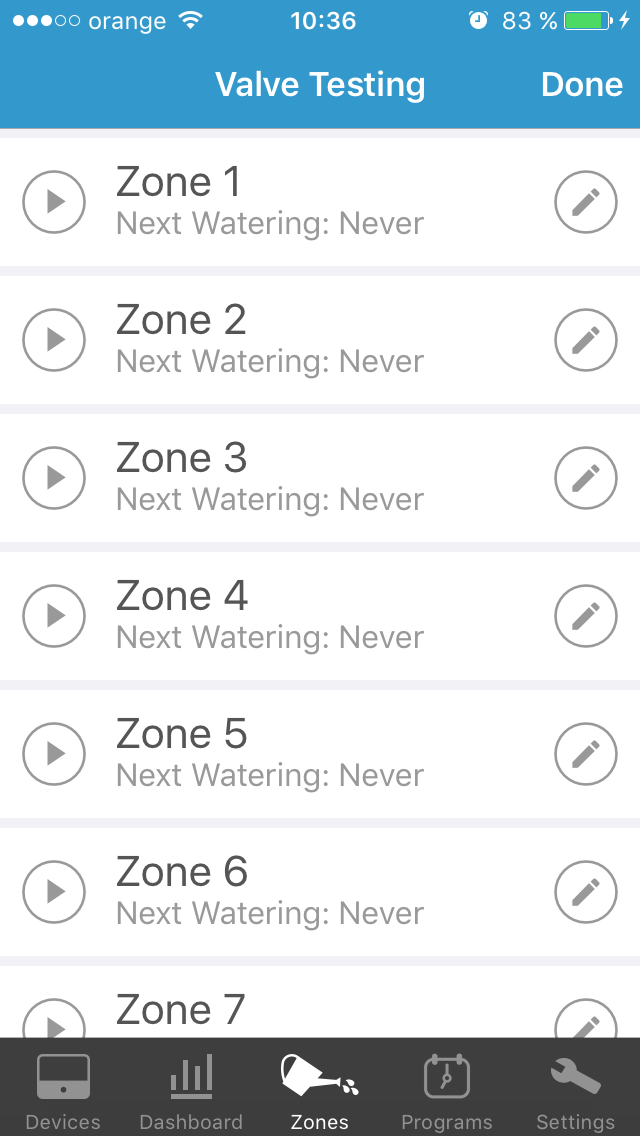
2) Using RainMachine mobile/web apps
Touch HD-12 and Mini-8
Zones - Zone 1 - Edit Zone - Master Valve (Pump) - Enable
Pro-8/16
Settings - System Settings - Master Valve (Pump) - Enable
Note: For RainMachine Touch HD-12/16 and Mini-8, the Zone 1 will become Master Valve and it won't show up on the Zones or in the Program Edit zones list as a regular watering zone.
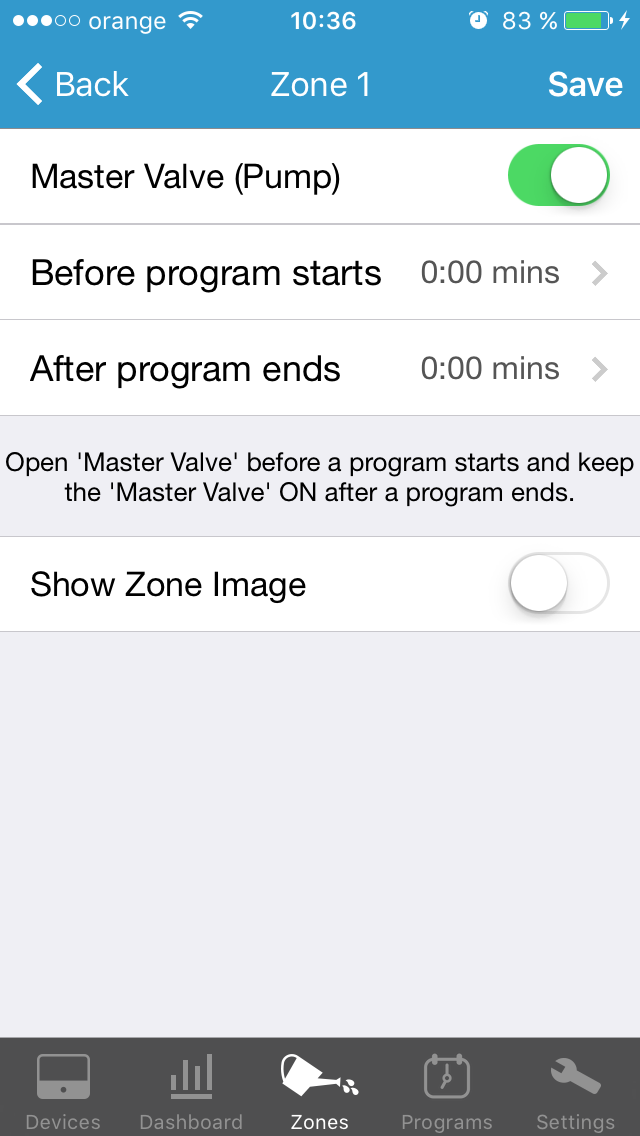
The master valve or pump start relay is now good to go. Every time a zone starts the RainMachine will start the Pump/Master Valve. Should you need to start the pump before the zone is activated (so that it can gather pressure and prevent 'pipe knocking') or keep it running longer after a zone is finished, edit Zone 1 and modify the "Before Program Starts" and "After Program Ends" times.
Wiring
Note: The RainMachine is a 24VAC device and will not drive the pump, it will simply activate the on/off relay, which in turn can switch on/off power to a pump. Most pumps require 220V to operate.
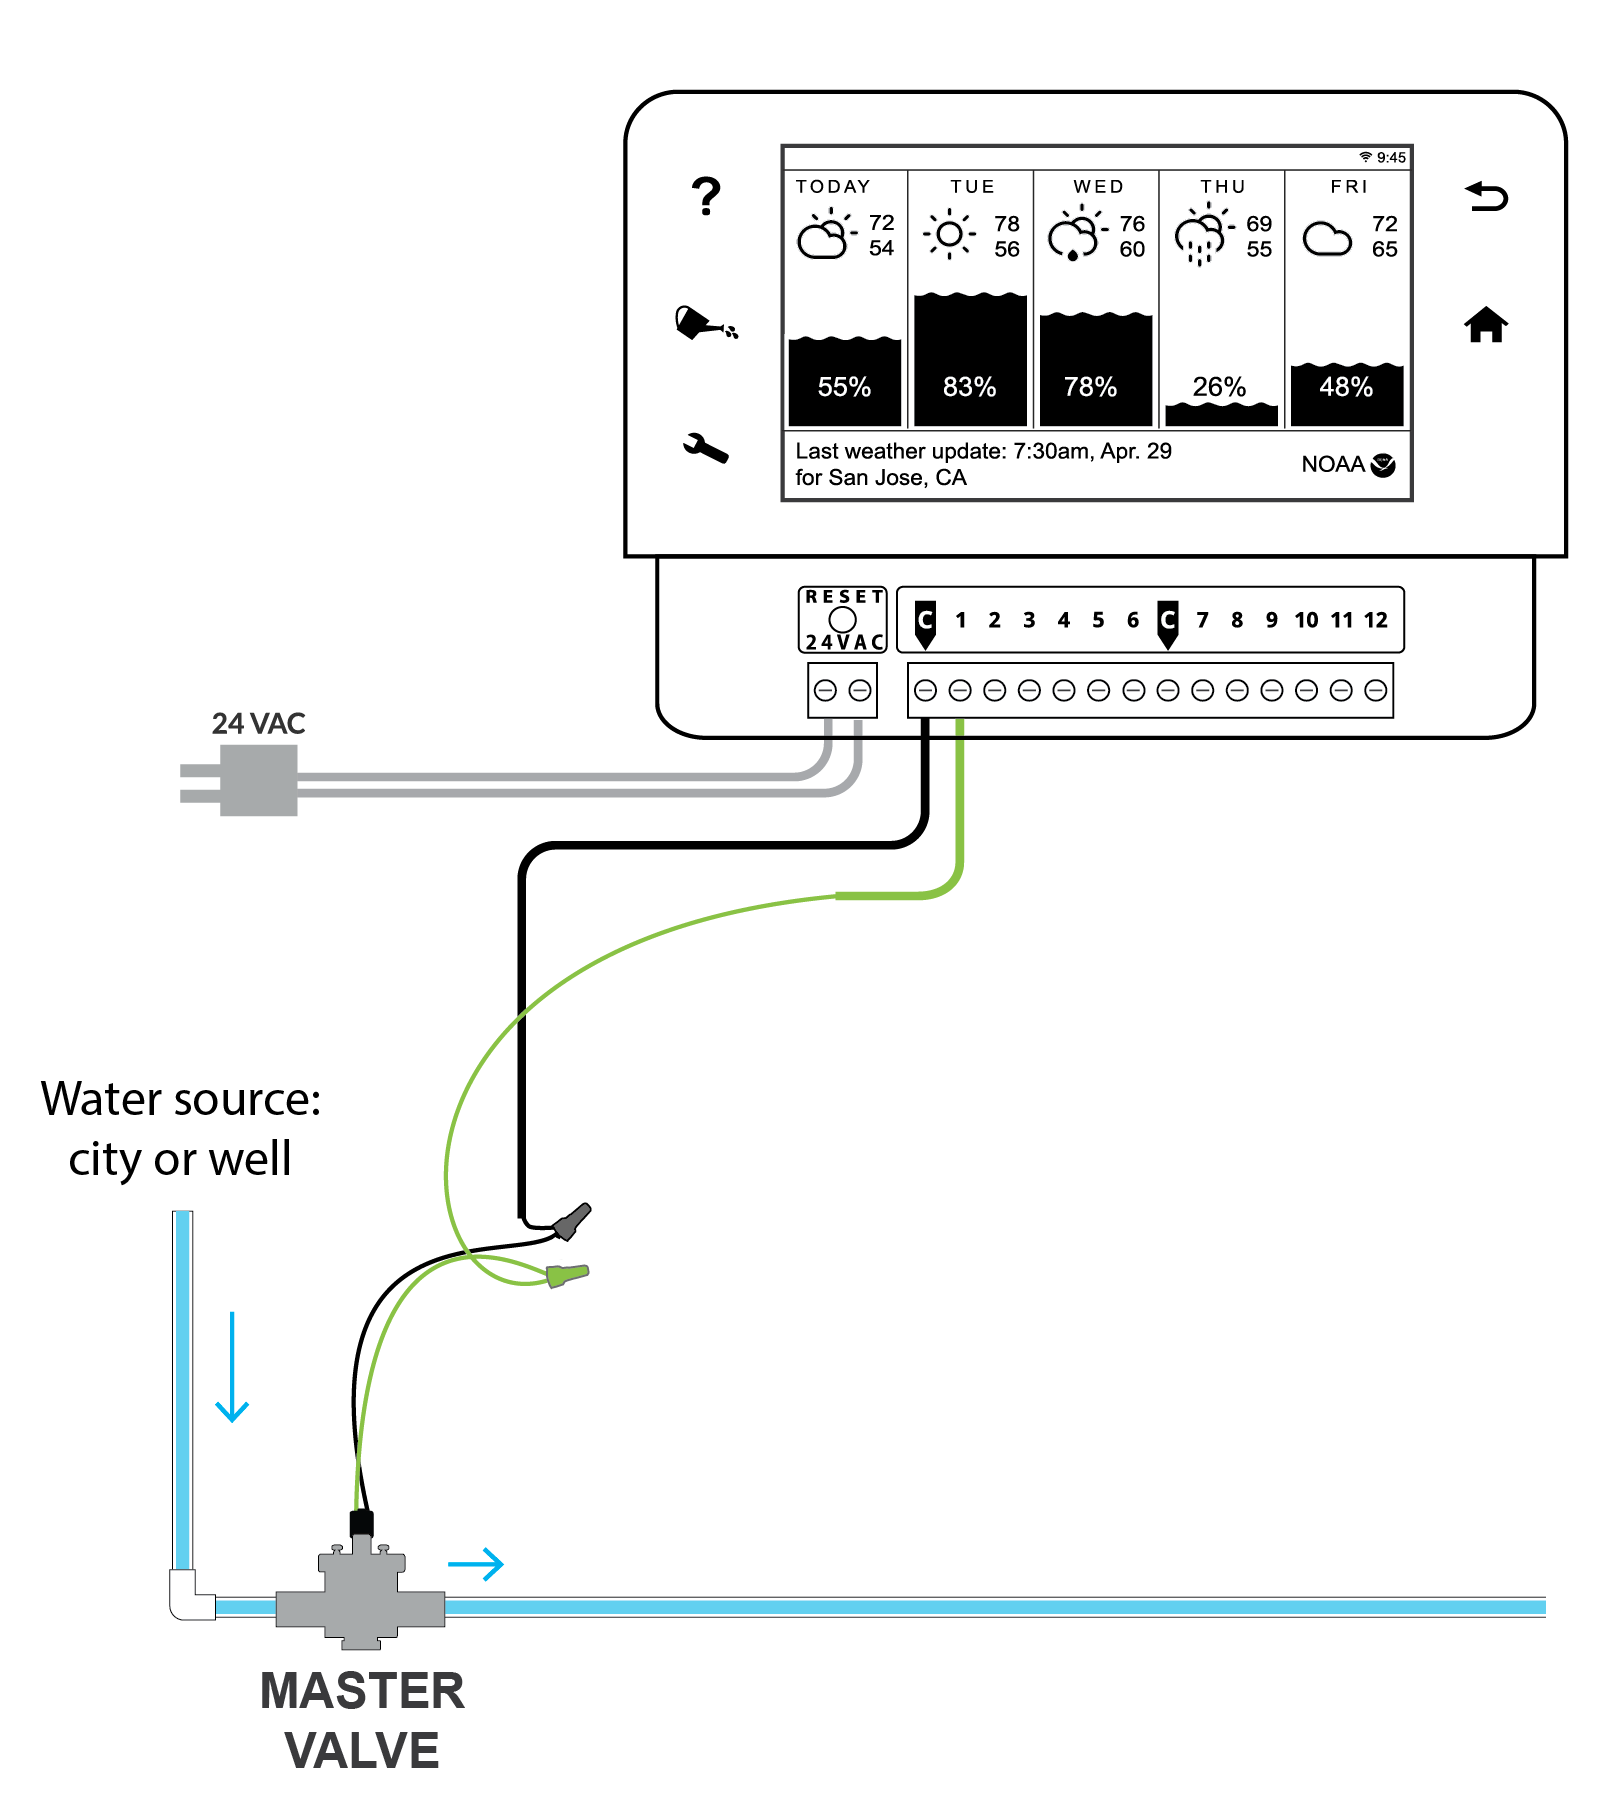
RainMachine Touch HD-12 Master Valve (Pump Relay) Wiring Diagram
(for references)
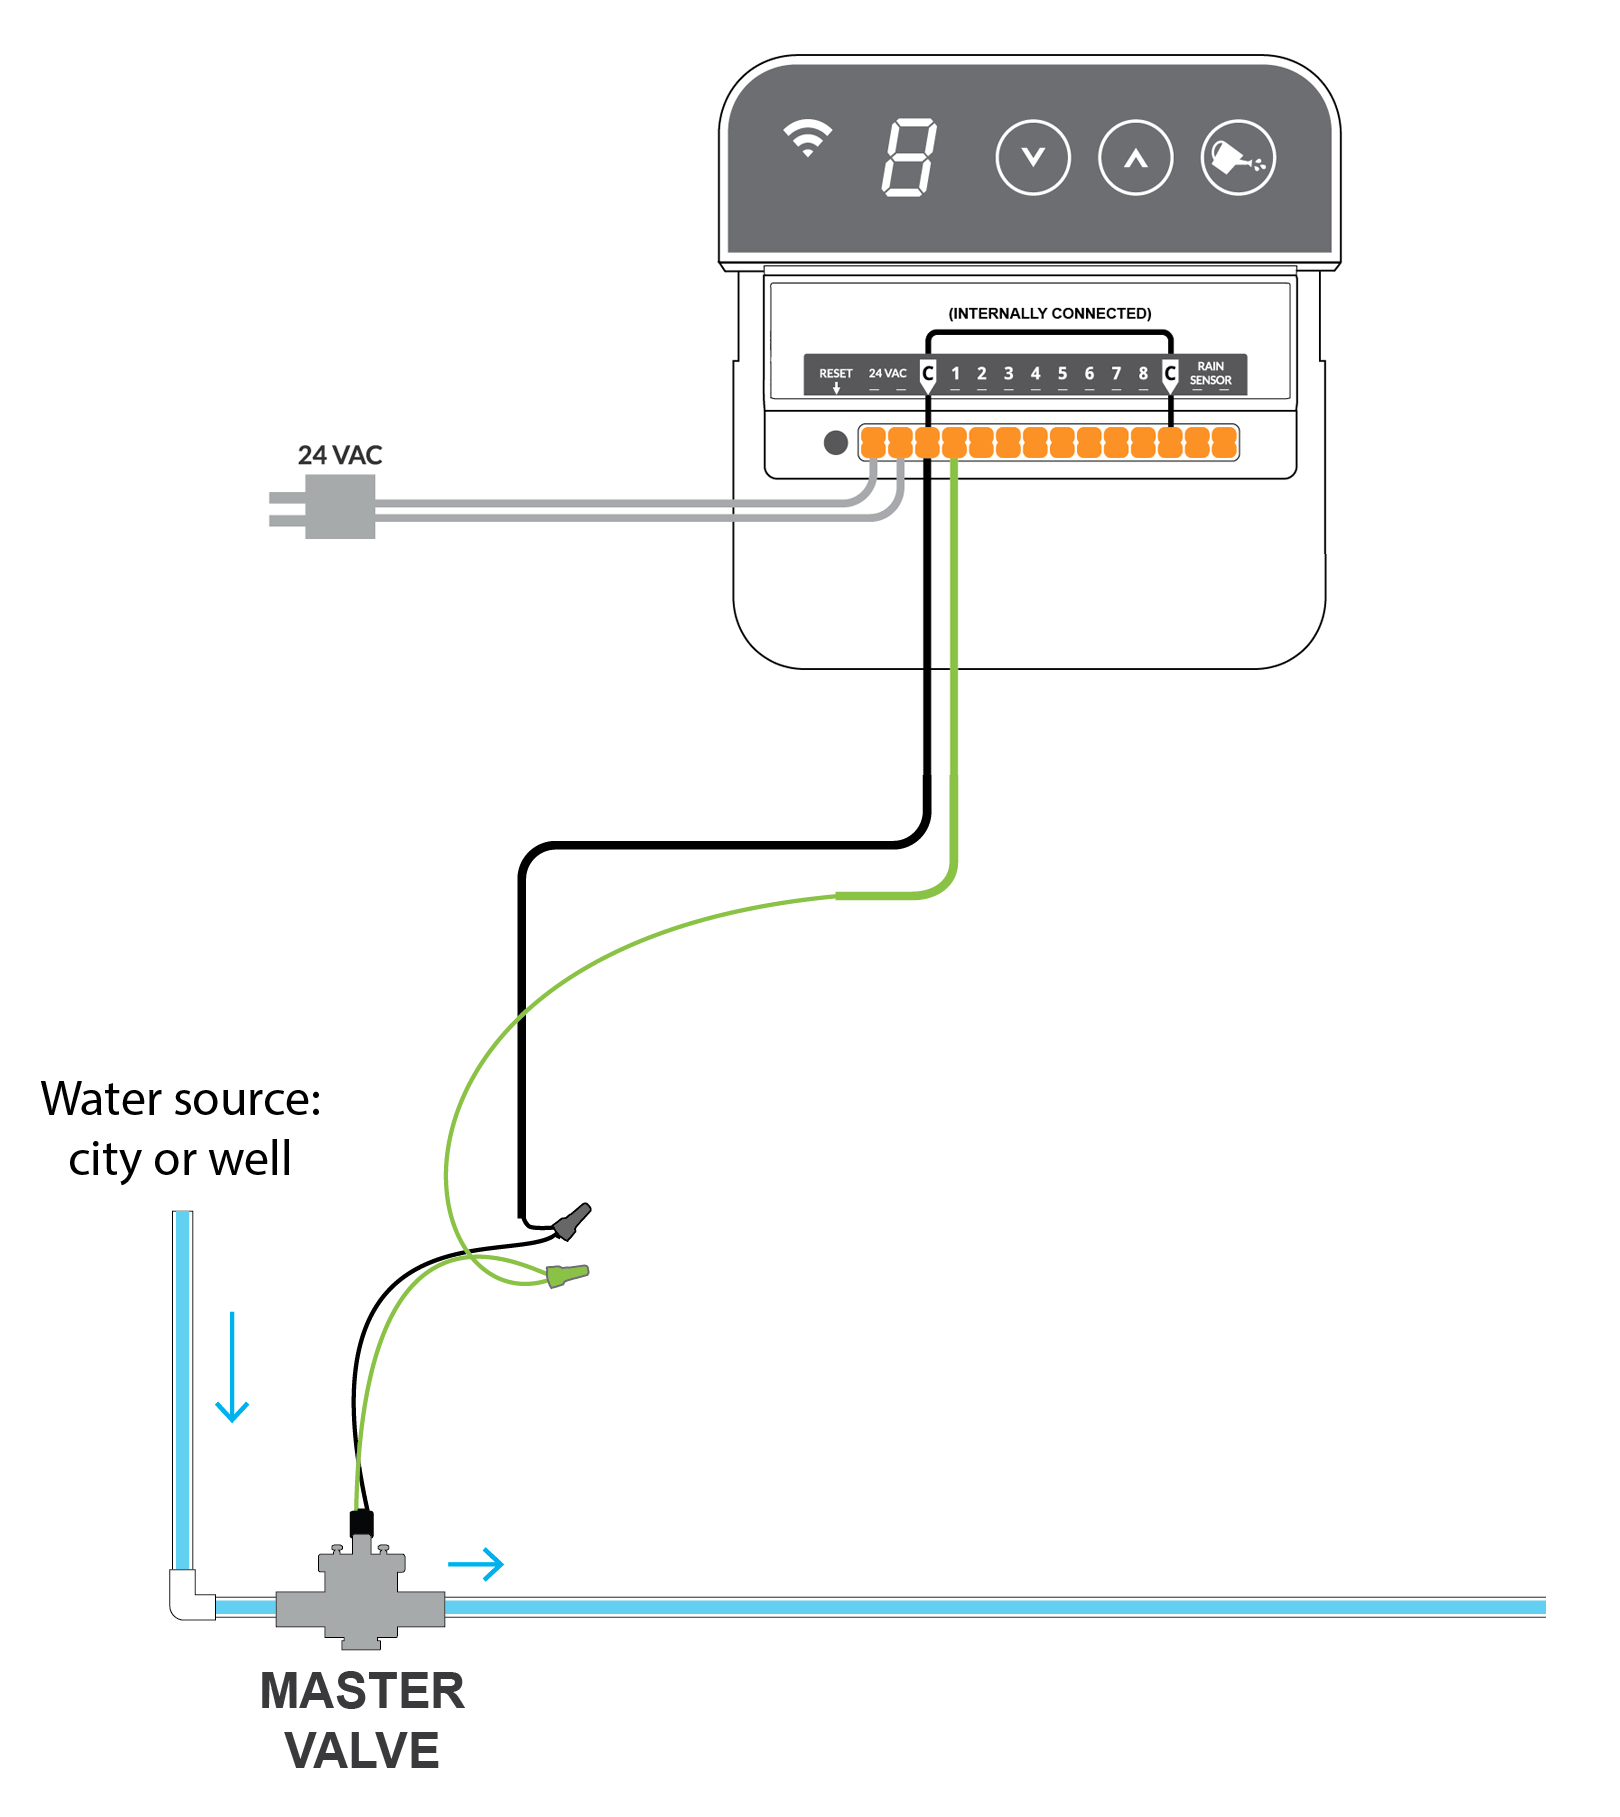
RainMachine Mini-8 Master Valve (Pump Relay) Wiring Diagram
(for references)
RainMachine Pro-8/16 Master Valve (Pump Relay) Wiring Diagram
(for references)
To view the complete wiring diagrams click on this links:
- RainMachine Touch HD-12 (Touch HD-16)
- RainMachine Mini-8
- RainMachine Pro-8/16 (page 5)
Note: You can use just one COMMON (C) terminal to wire all RainMachine zones. The RainMachine devices have all COMMON (C) terminals internally connected and it doesn't matter which one you'll use. They are added for a better wire management.
Comments
0 comments
Article is closed for comments.