Preparation and Installation
- Locate and label wiring
- Remove Hunter equipment
- Mount and install RainMachine
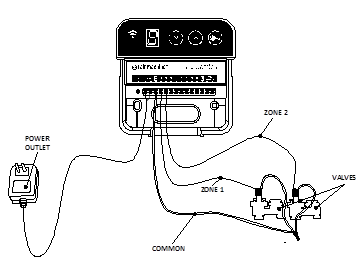
Locate and label wiring
You will need to locate, disconnect, and label the following for use on the RainMachine
- 1. Com
- 2. P/MV
- 3. Zones 1-12
Remove Hunter equipment
Next, remove the power adapter from the wall.
Now the Hunter should be free of cables and ready to detach from the wall.
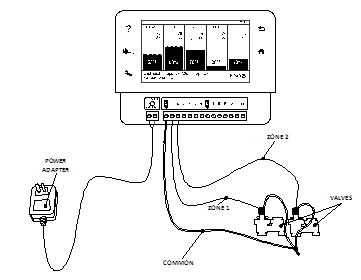
Mount and install RainMachine
Fastening unit
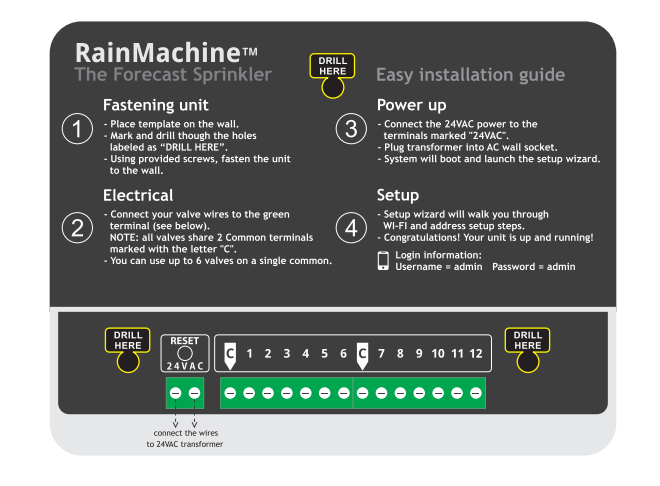
● Place the RainMachine controller close to an electrical outlet. We recommend placing it indoors (i.e. garage).
● The quick setup guides are also fastening templates. Place the provided template on the wall. Mark and drill through the holes labeled “DRILL HERE”.
● Using provided screws fasten the unit to the wall.
Wiring unit
- Remove the white plastic terminals lid by pressing on the 2 edge dimples white pulling up the tabs below them.
- Connect "Com" from Hunter to "C" on the RainMachine
- Connect "P/MV" from Hunter to "1" on the RainMachine (if P/MV was used)
- Connect your zone wires to the remaining zones 1-12.
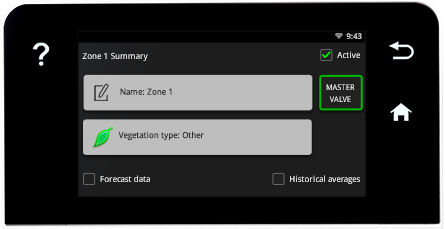
Important
If P/MV was in use on Hunter you will need to enable this in the software on the RainMachine.
Edit Zone 1 and enable it as a "Master Valve".
Comments
0 comments
Please sign in to leave a comment.