Please post pictures of your Rainmachine installation...
Pinned FeaturedPlease post pictures of your Rainmachine installation...
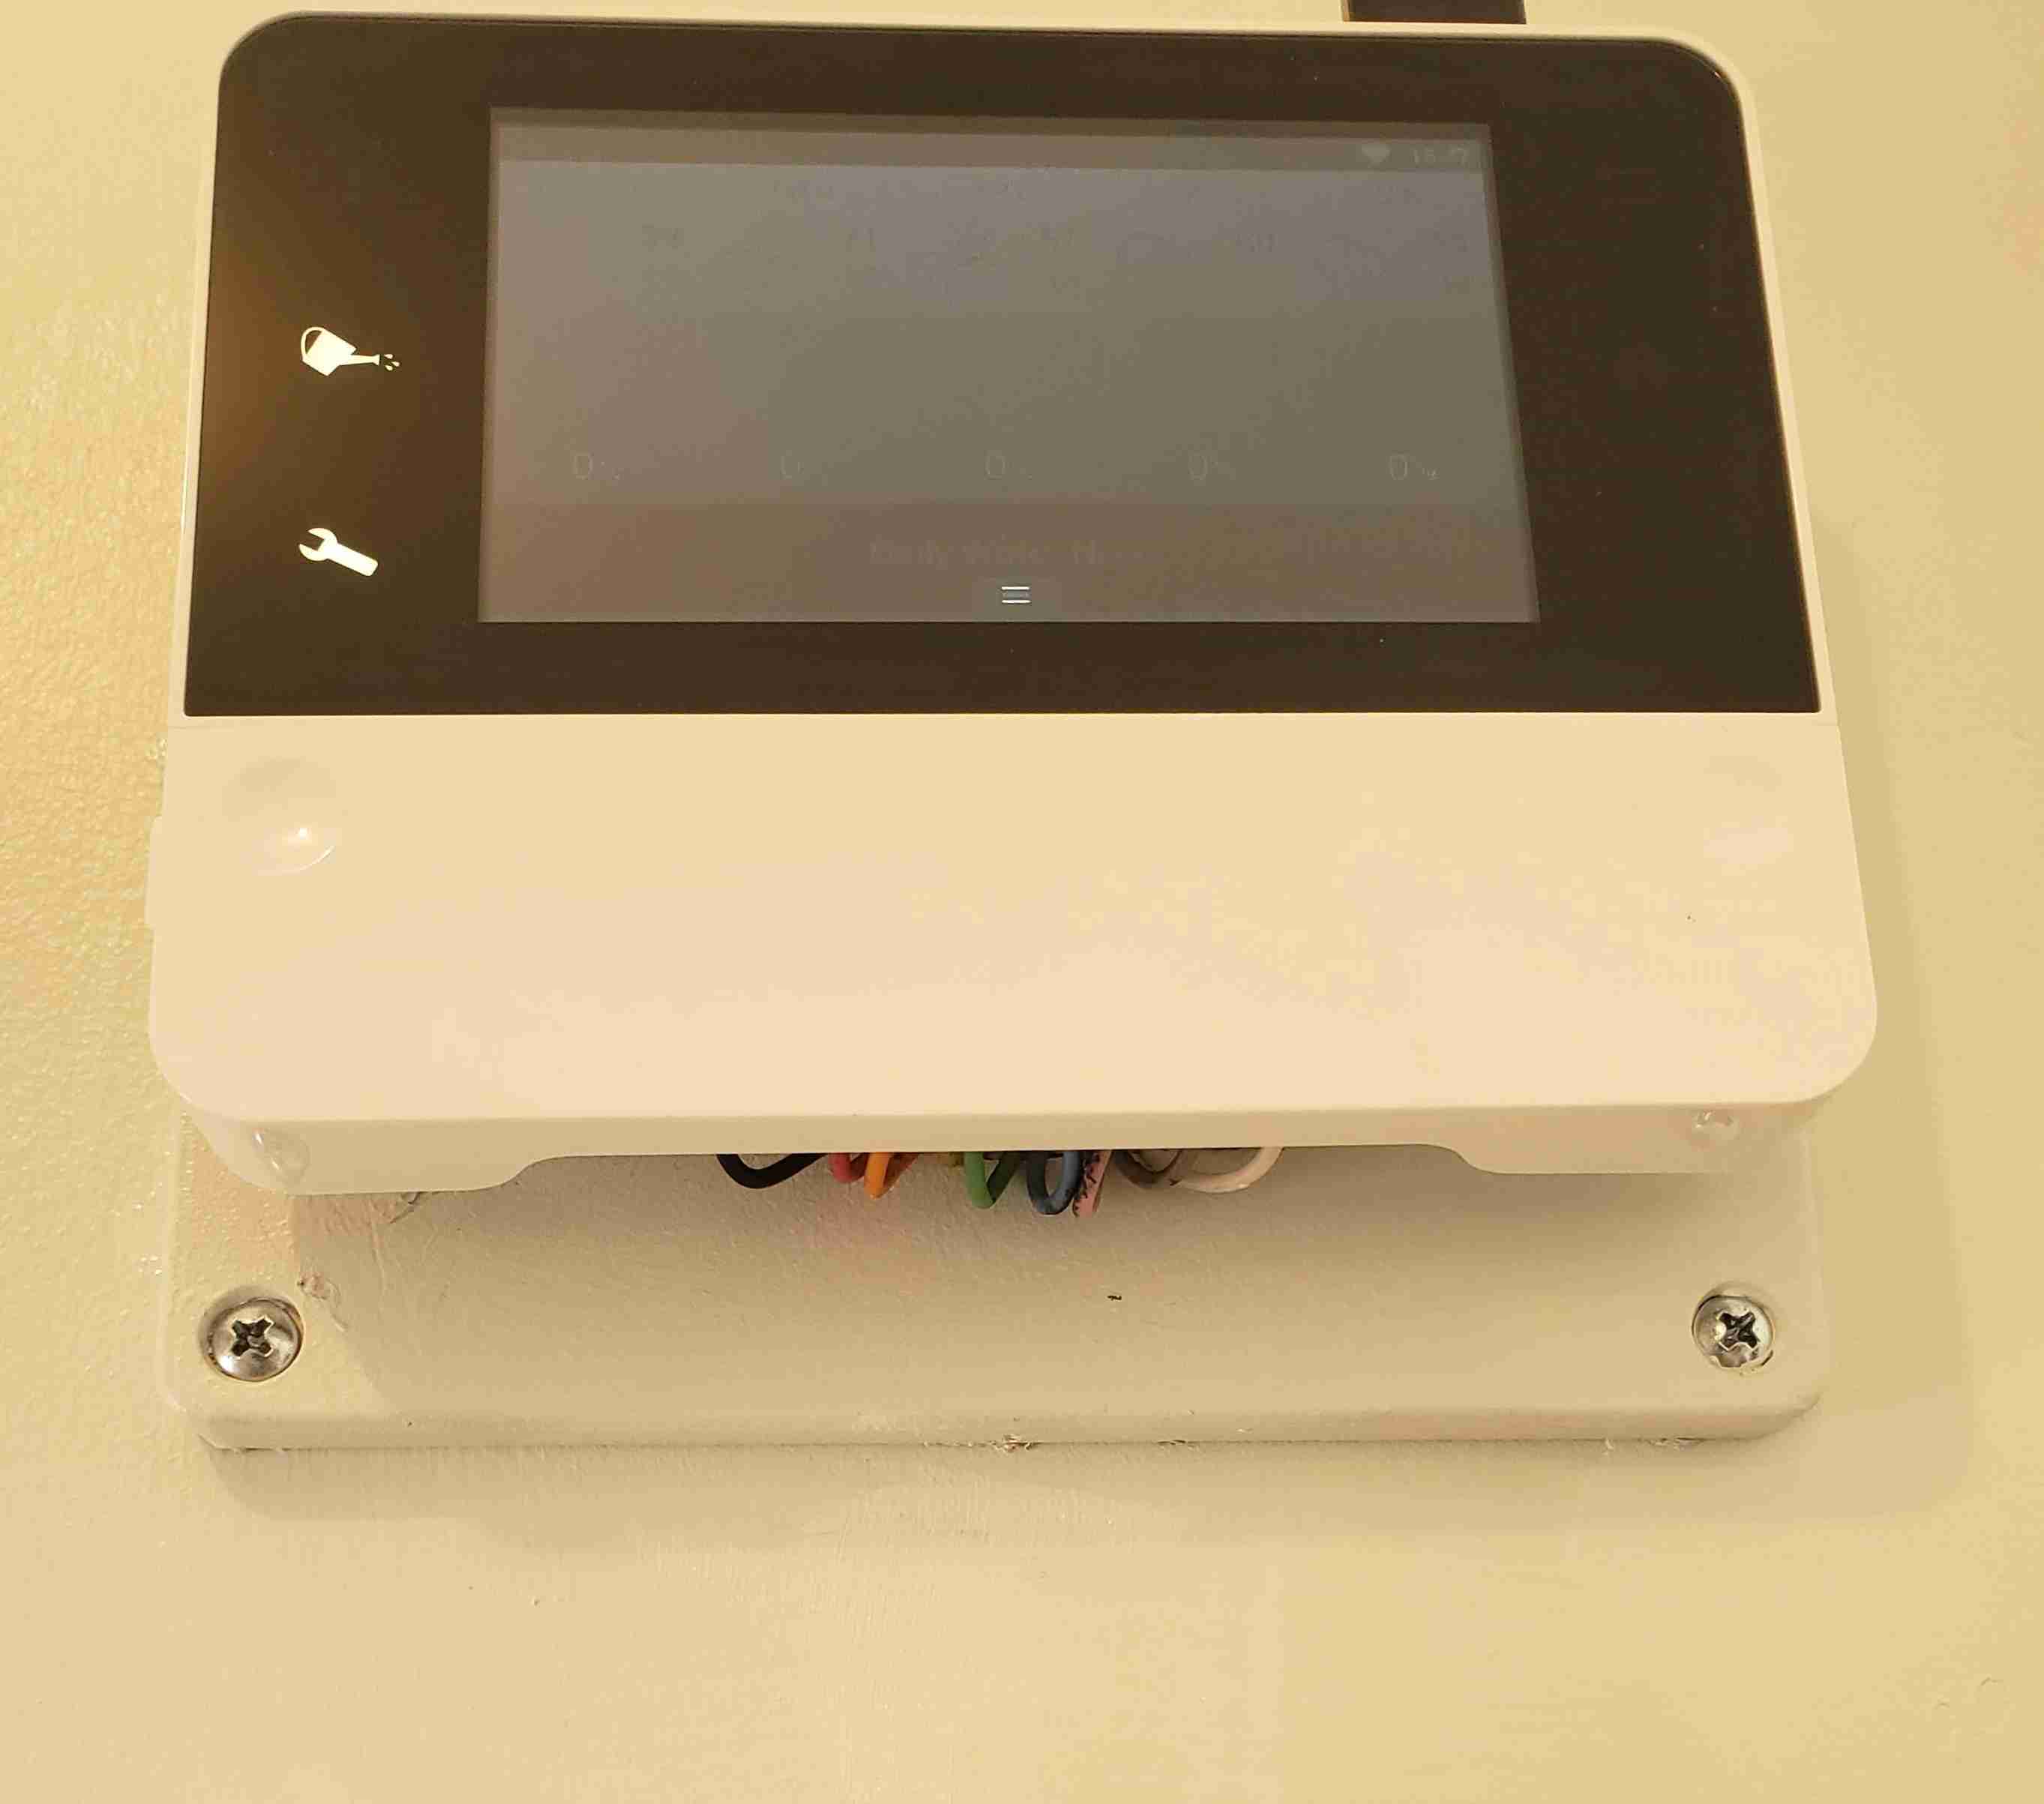
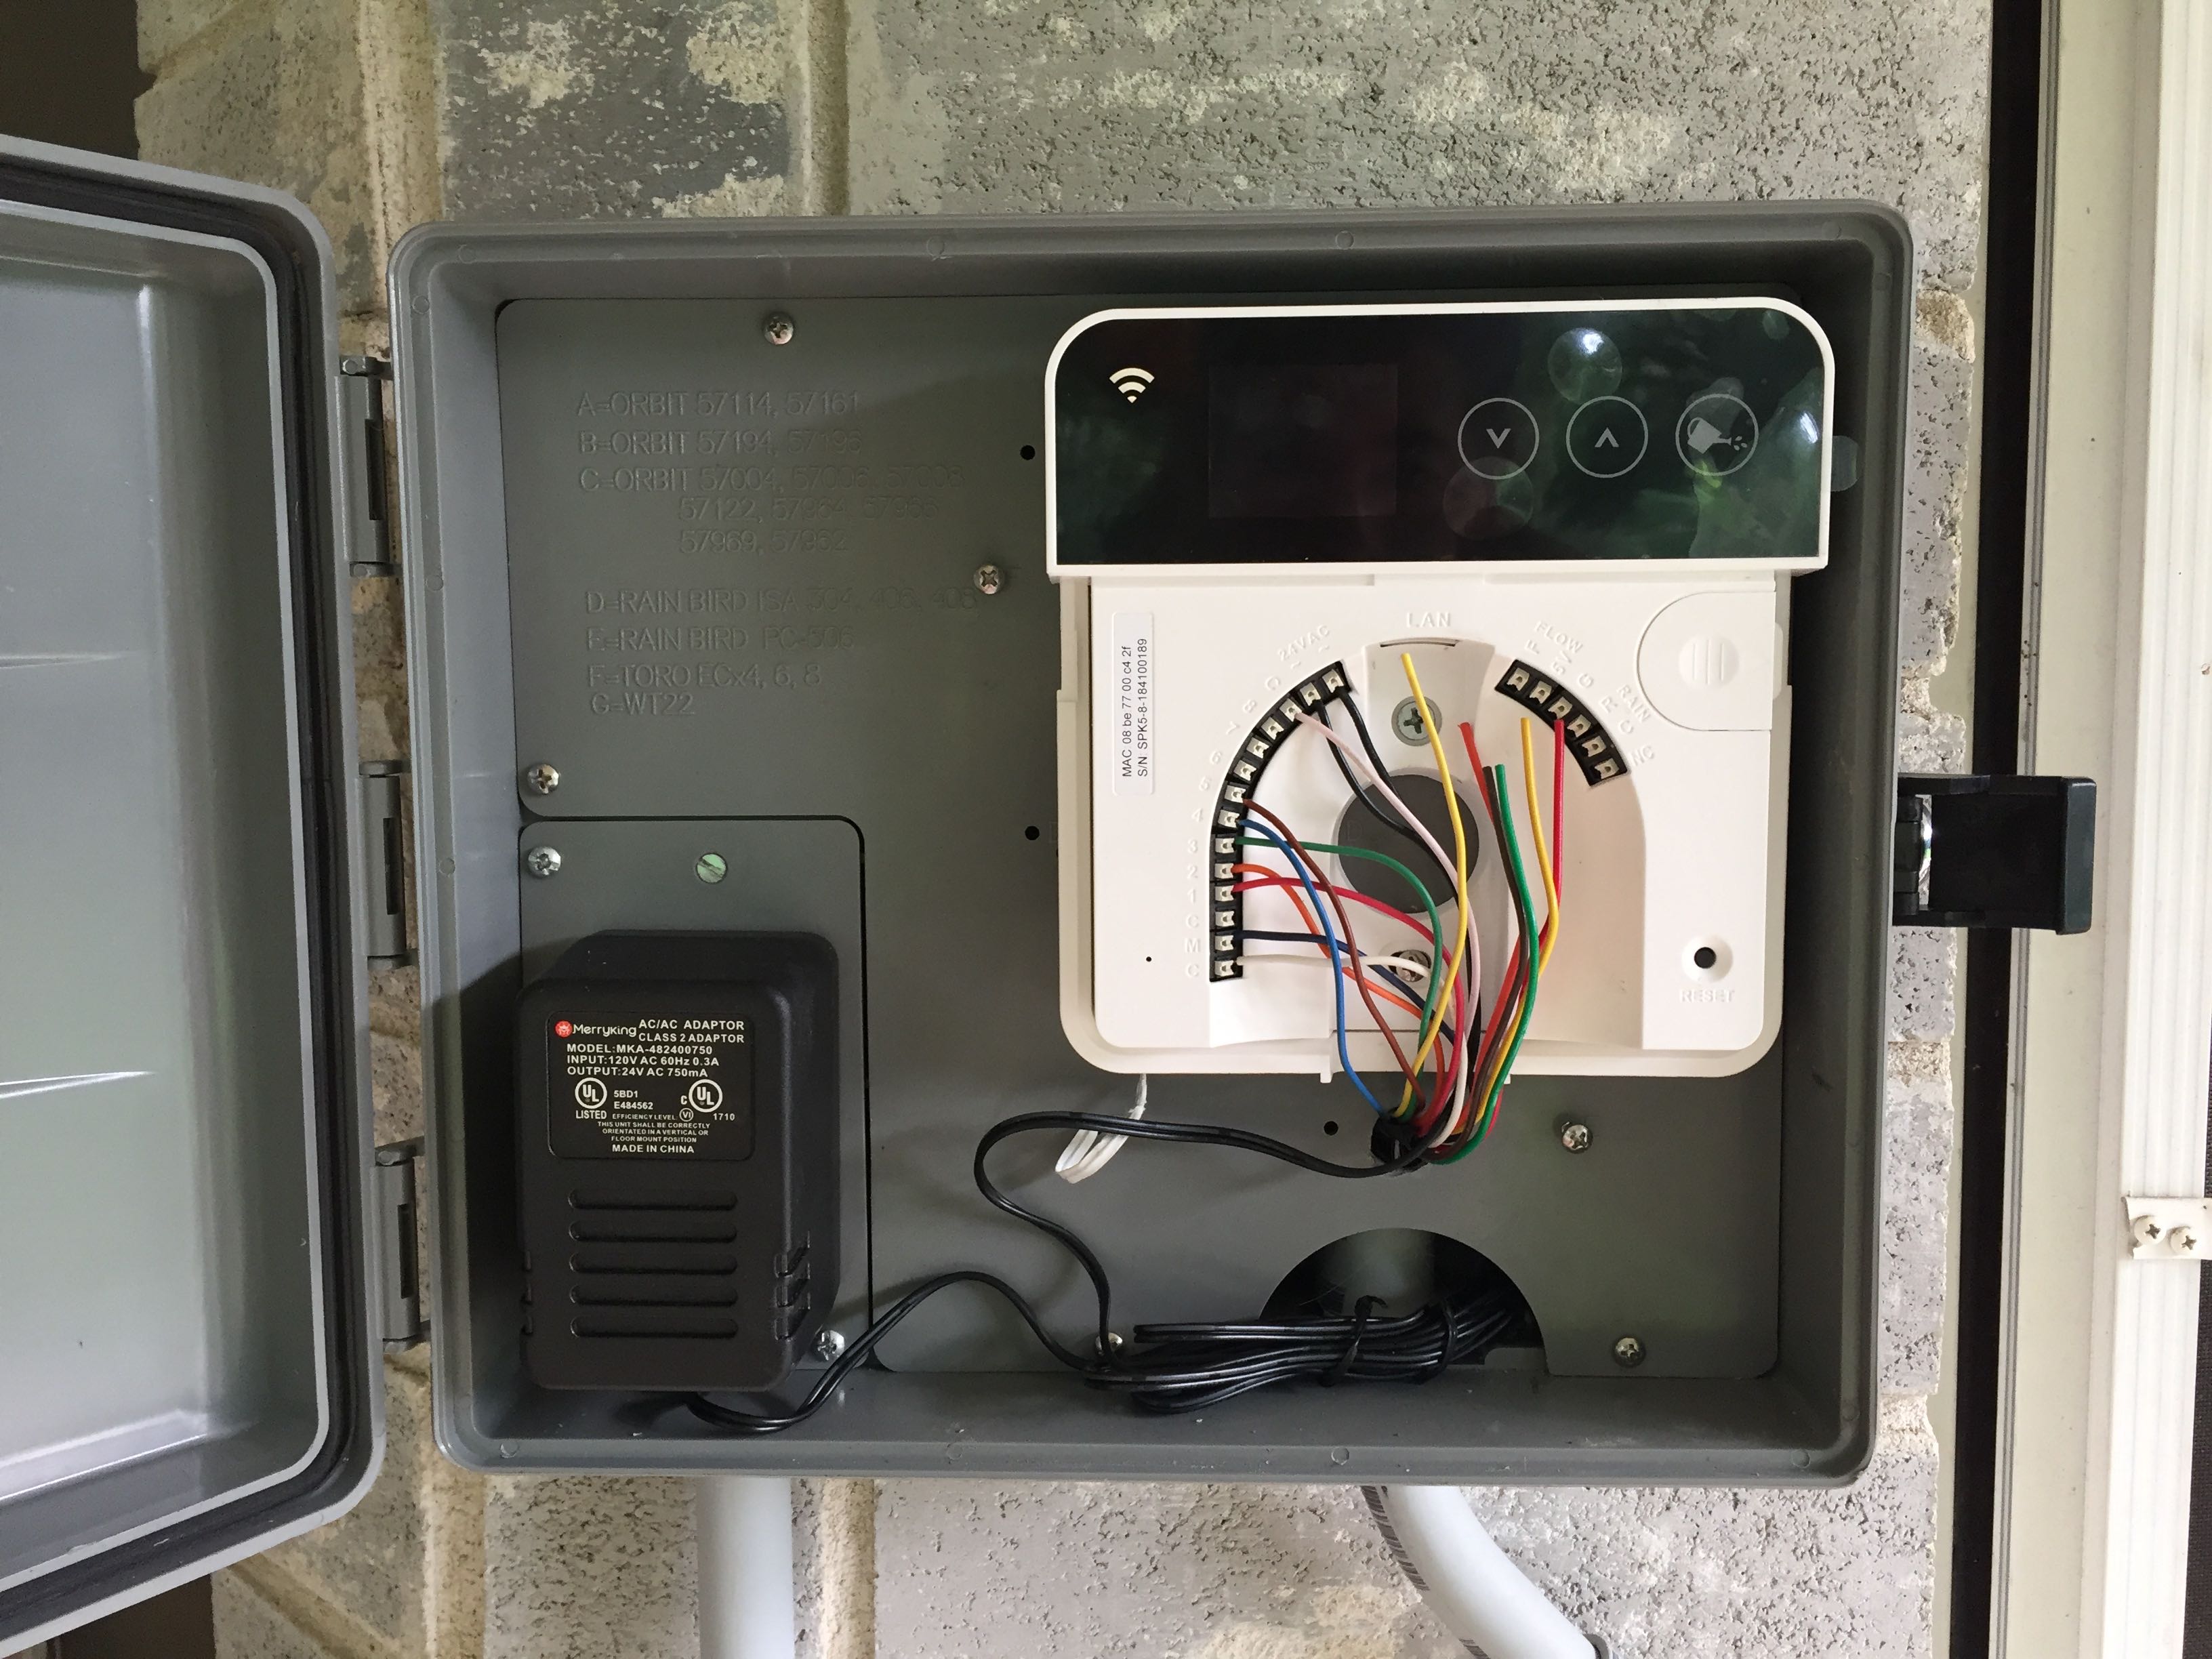
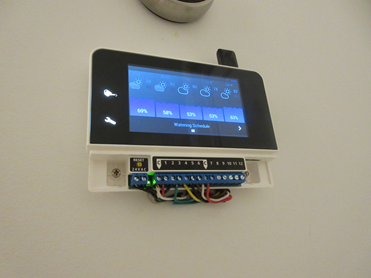
Here's mine... Has anyone come up with a technique for hiding the stripped wires leading into the bottom of the controller... IMHO looks messy and unprofessional yet works wonderfully.. (The masking tape was my way of numbering each zone while transferring from the old controller)...

-

Hey! I just wanted to post my version of the Rainmachine installation to give some people a little more hope on a cleaner install. I pulled out the typical Rainbird enclosure with the PVC going all the way up to the old Rainbird enclosure. I decided to run the wires through the wall since it would look better (worth the 25 minutes it took). I just wanted the installation to look clean and neat. I purchased a 6x6 grey electrical enclosure from Menard's and only used the cover (that's the gray piece in the one picture). My installation came out pretty clean so I am happy! Don't laugh, but I haven't actually used the unit yet because the sprinklers have not been started up! I have a spinkler repair service coming in a few weeks to do the startup because I have a few heads damaged. I can't wait!
-

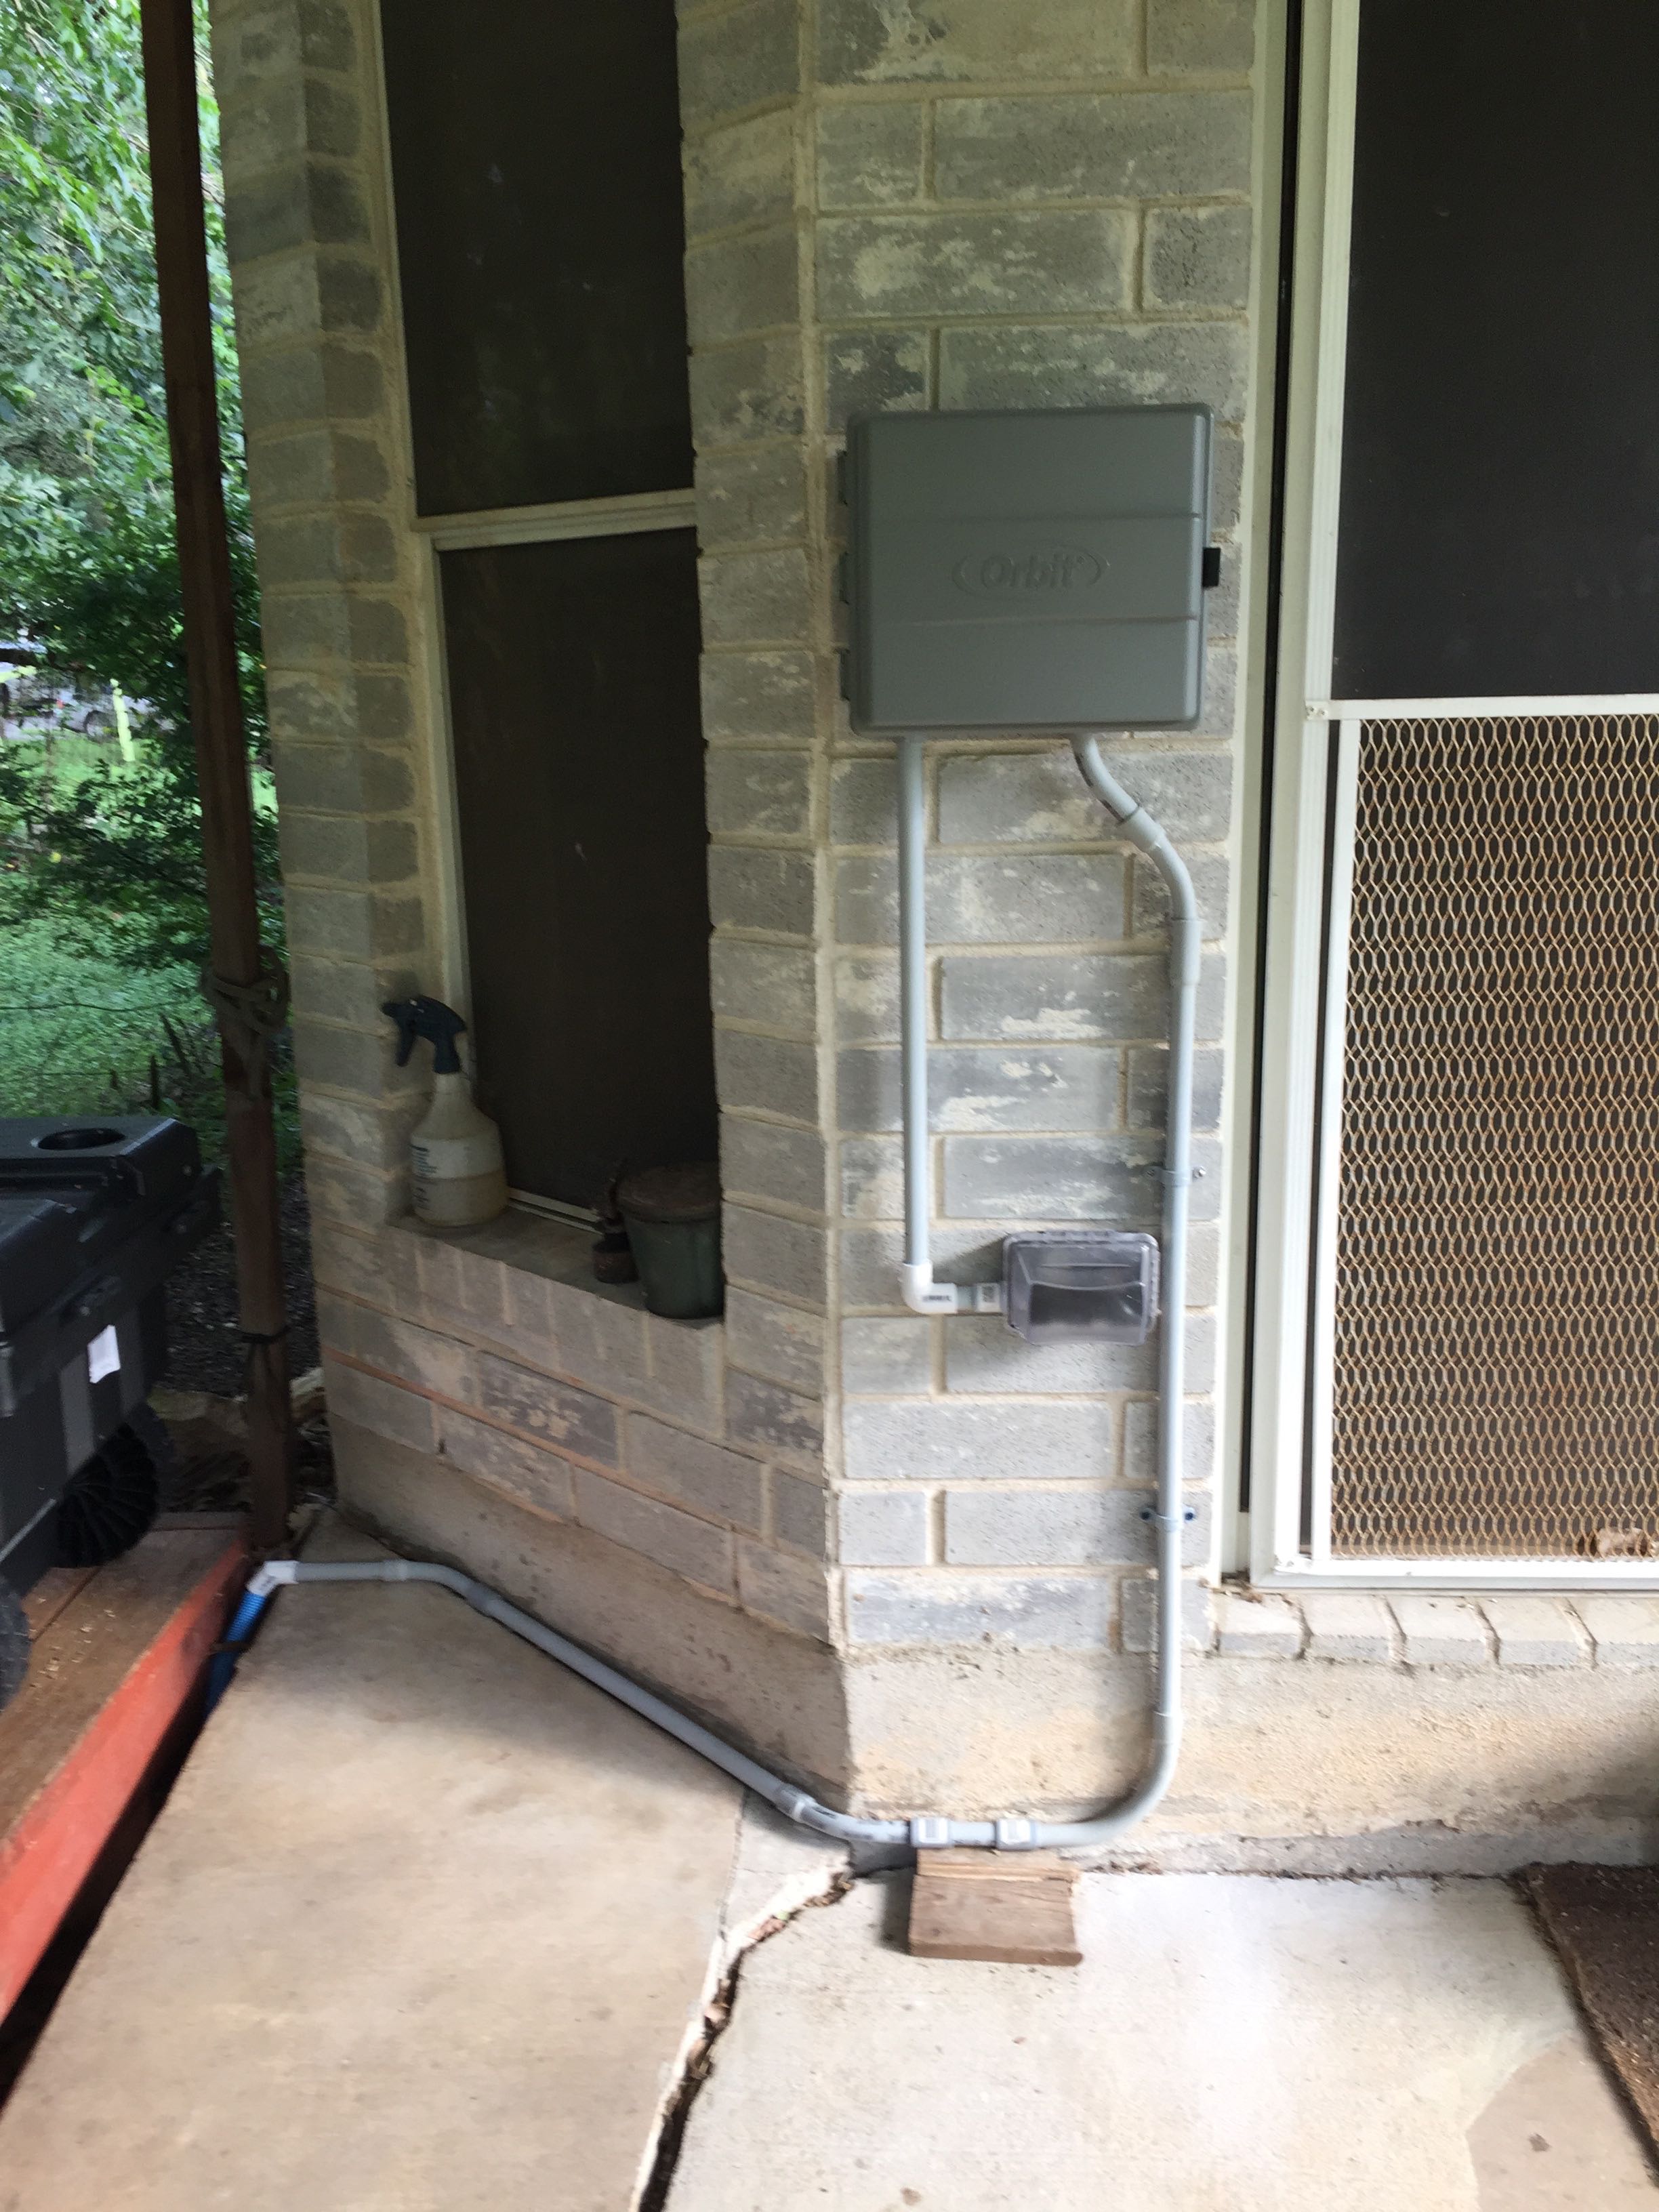
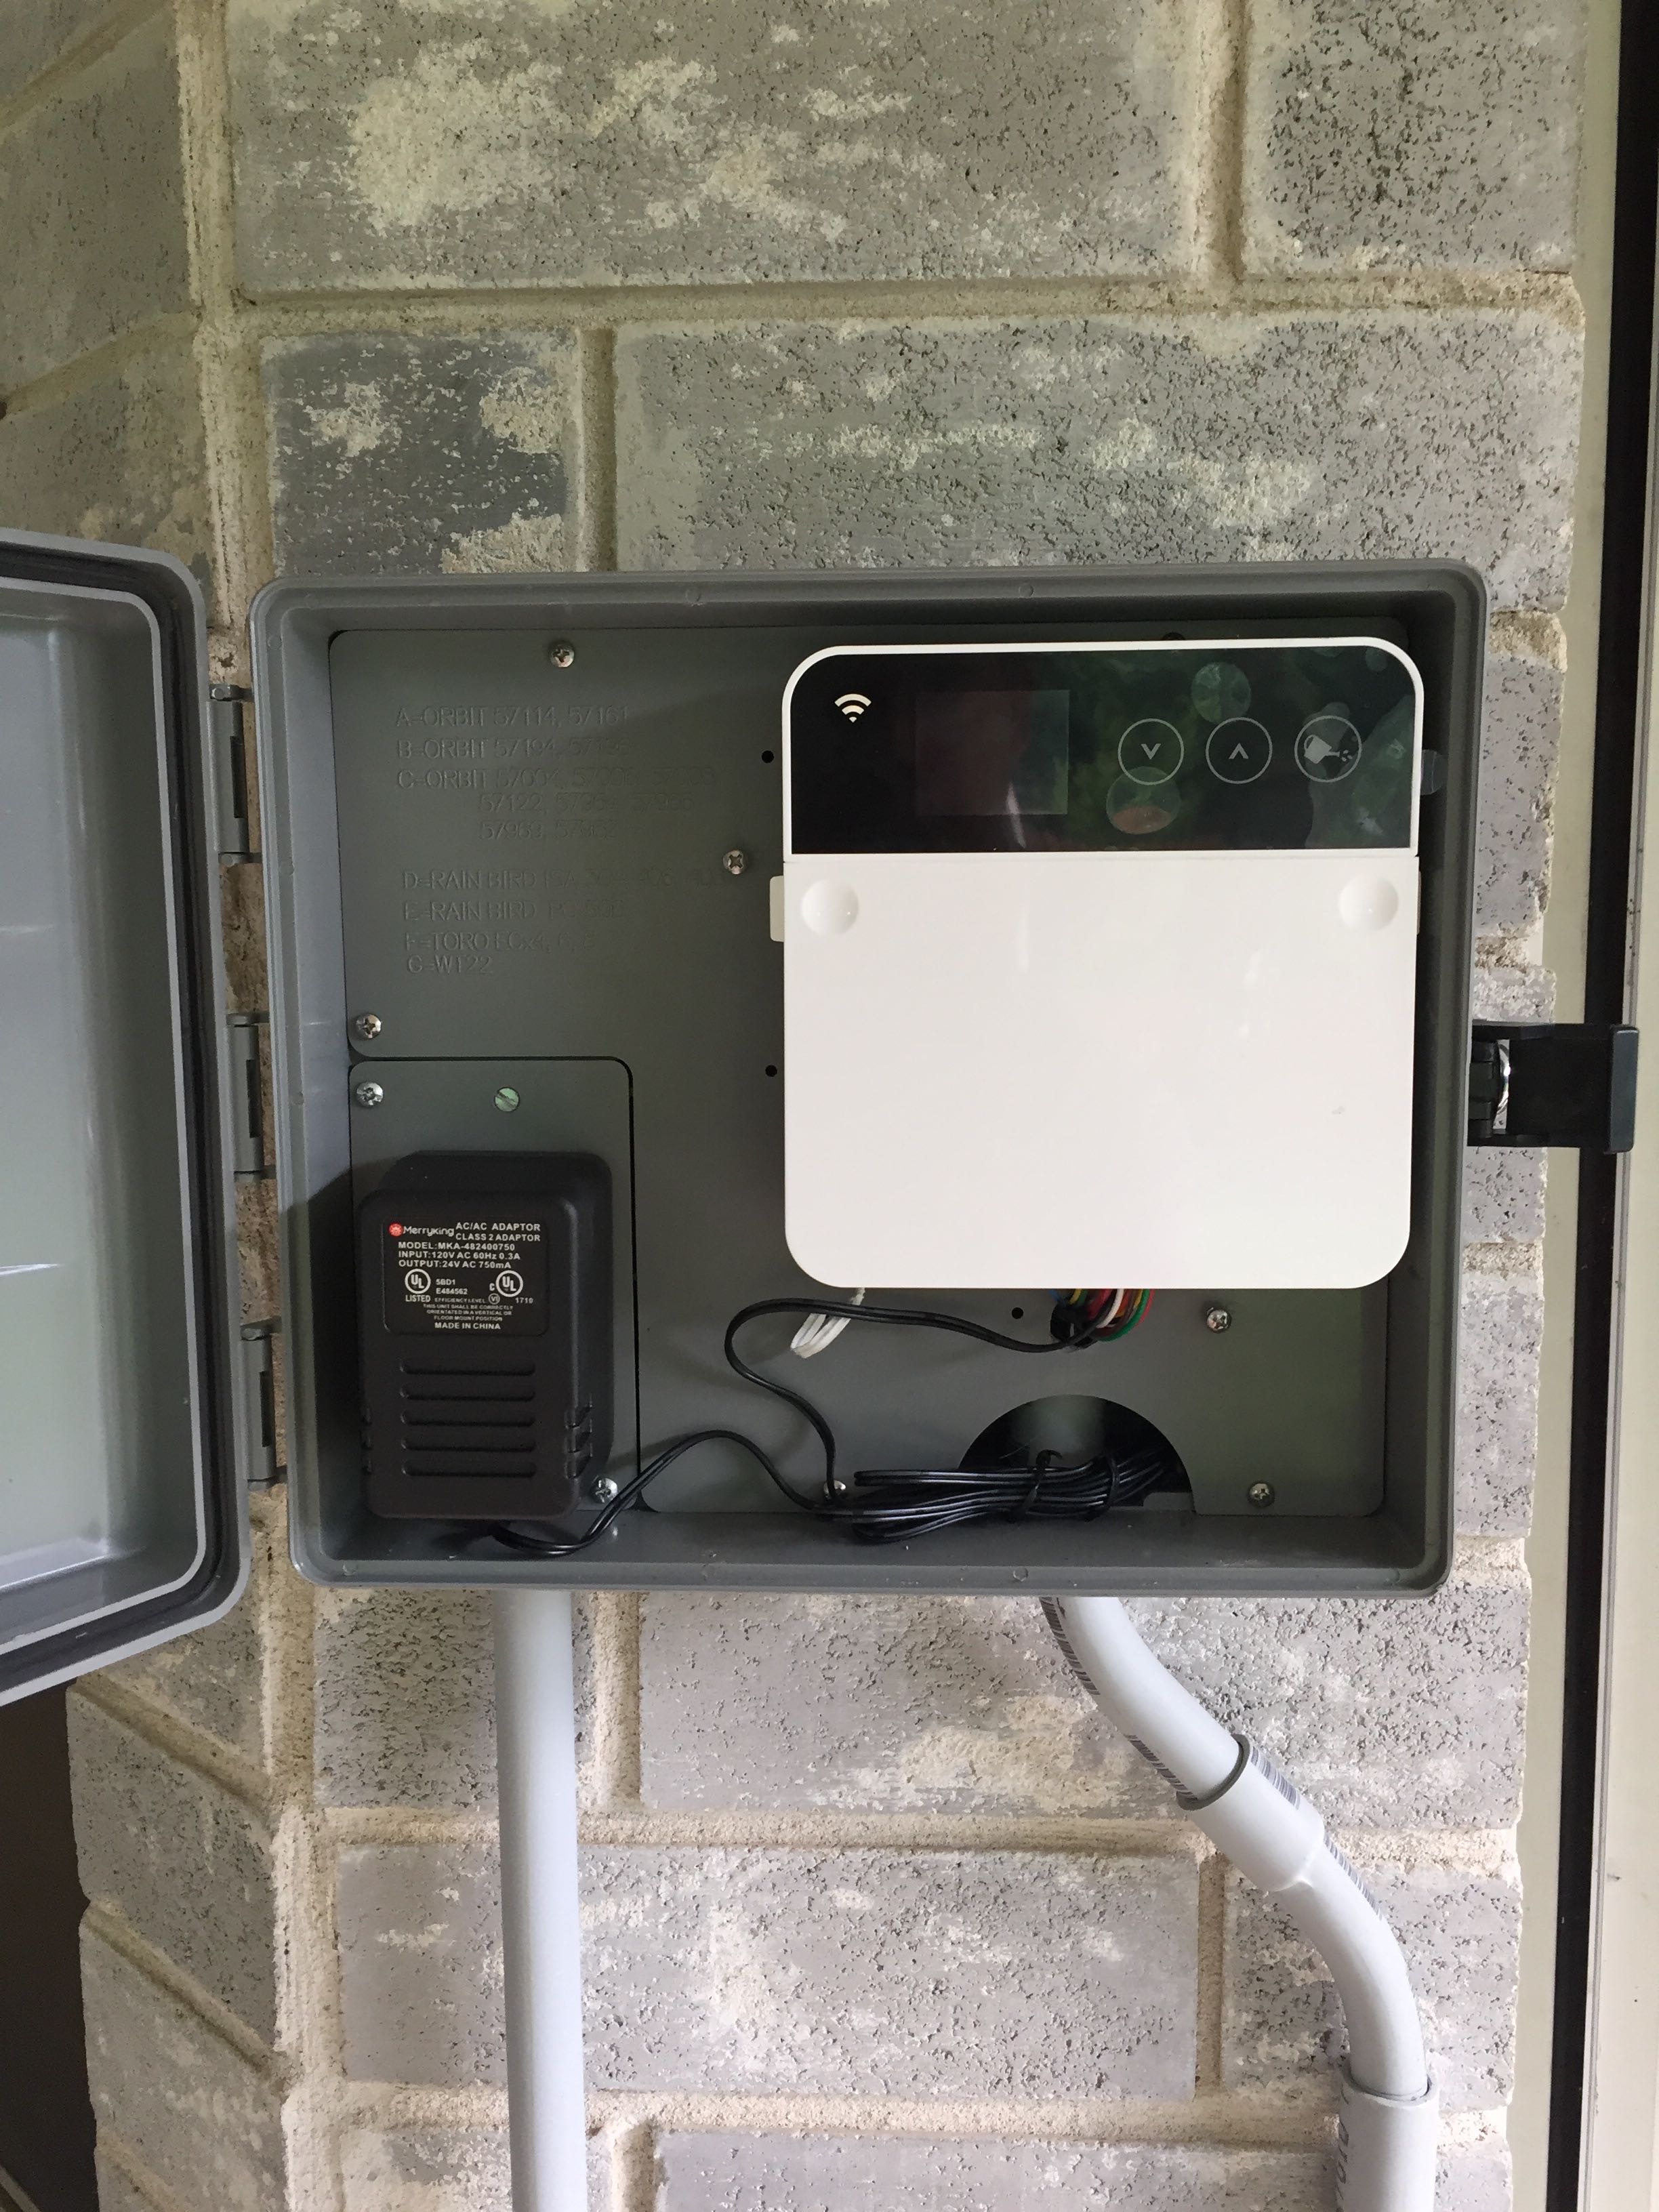
Has anyone found an outdoor rated case that is smaller than the Orbit one? I have that one for now and it works. But it leaves a lot of empty space in the cabinet so a smaller enclosure would work. I don't think it could be much thinner because of the outlet and adapter plugged into the outlet. Unless the outlet was rotated and flipped up so the adapter wold plug in horizontally from the top.
-

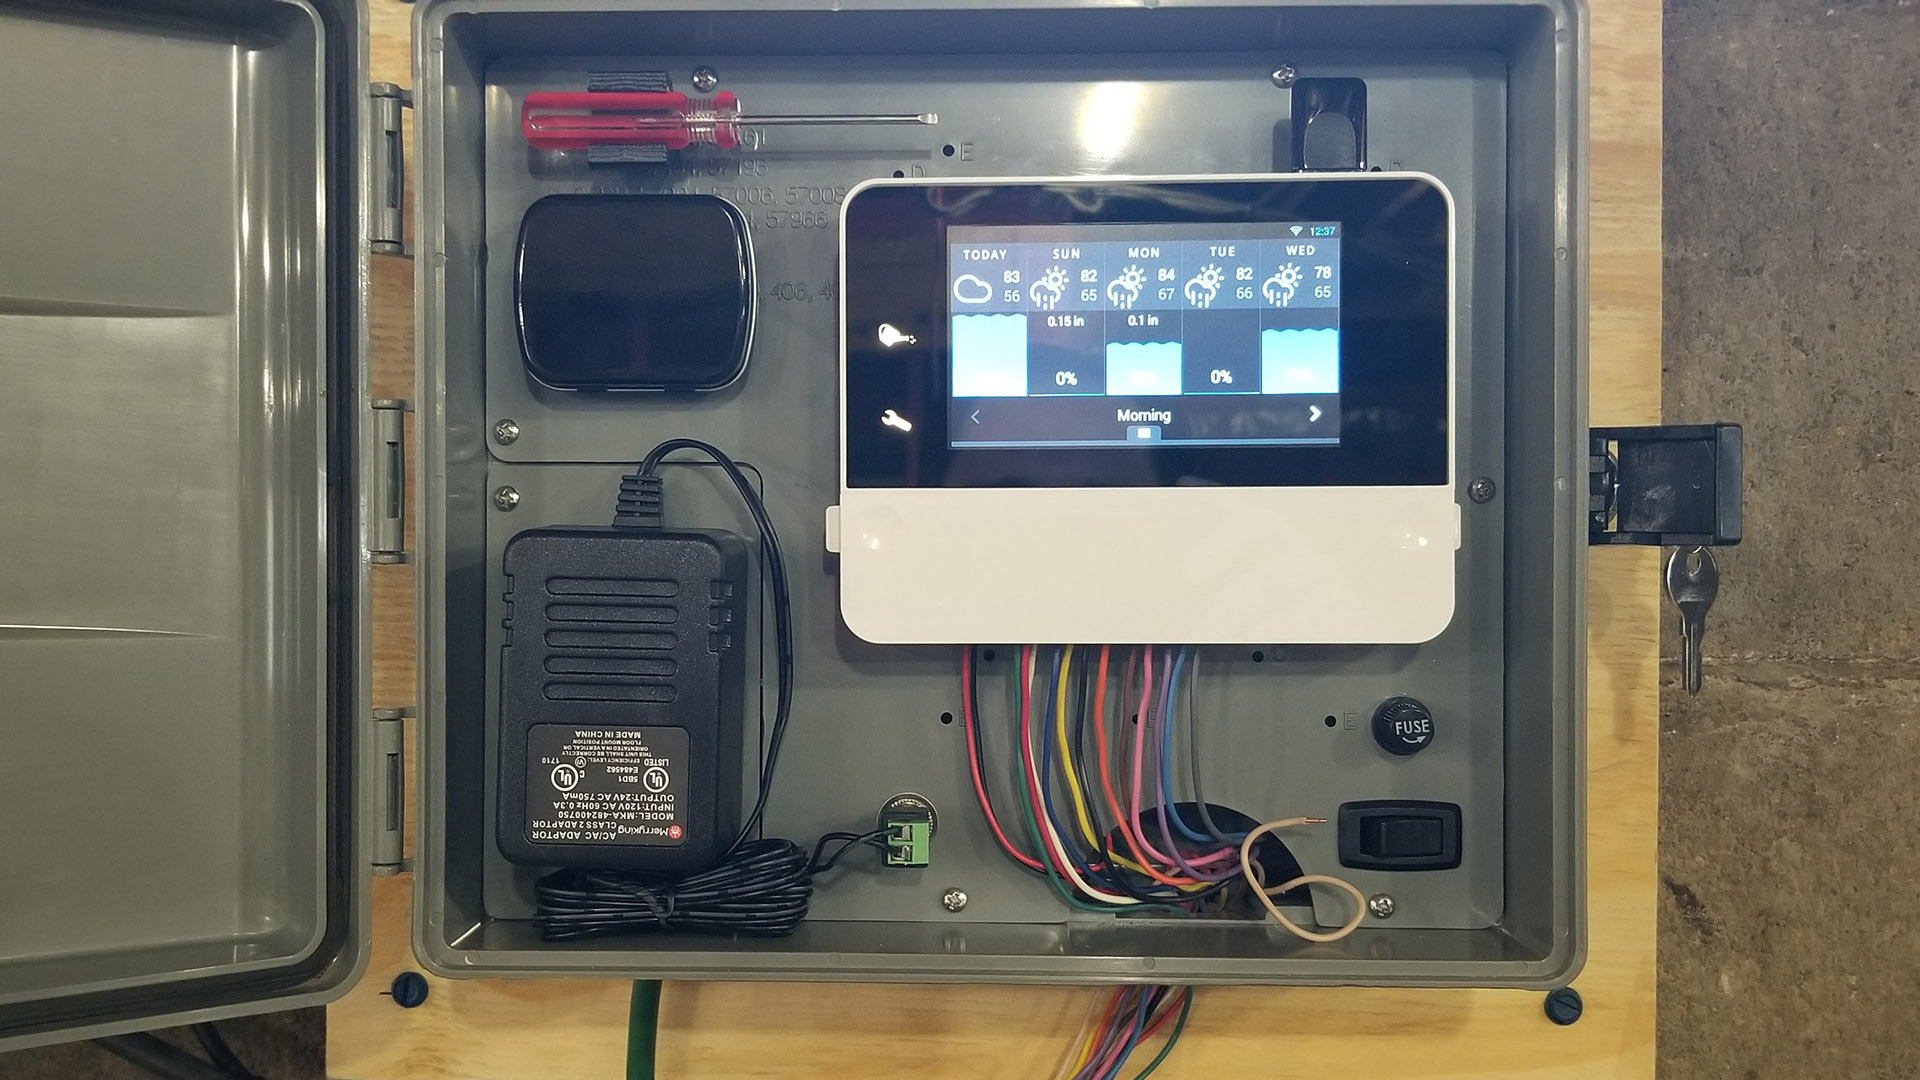
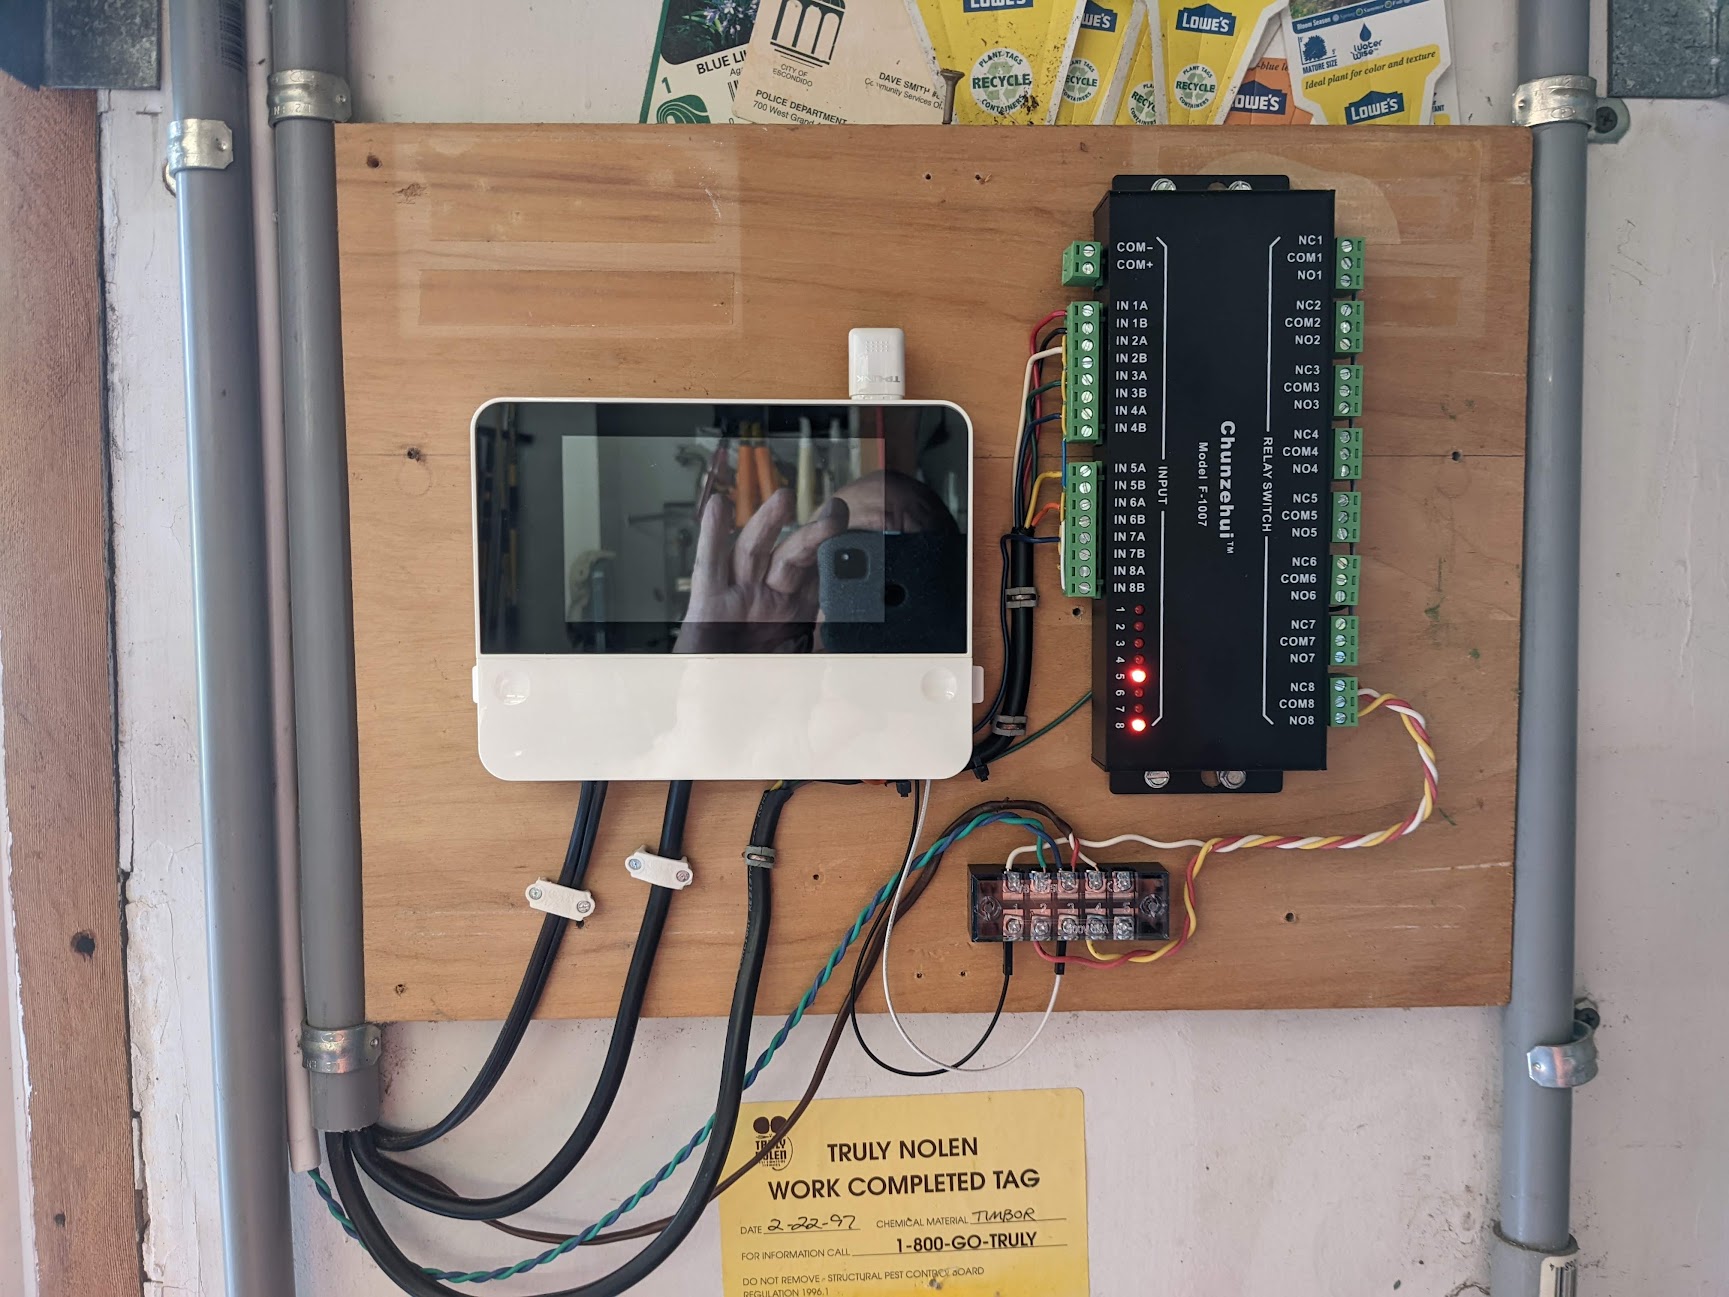
Here's mine. I have it in an Orbit outdoor enclosure even though it's inside in the garage. I added a barrel plug for the transformer to make it easy to remove/replace. I also added a 750mA fuse and an on/off switch to cycle the power in case I need to. Last but not least, a 3D printed mount to keep that little screwdriver handy and also a small black tin velcroed in place to keep some extra fuses handy.
-
I ended up going with the Orbit enclosure. At some point if I need an extra plug I'm going to flip the transformer to uncover one of the outlets. But may need to add some kind of bracket to make sure it doesn't fall out. I swapped out the GFCI outlet with a non-GFCI outlet since the outlet is already getting power from an outdoor GFCI outlet.
-

Mine is really simple. Its just wires hanging on the way because I removed the piece of crap HD-12 that kept hanging up and couldn't water 2 frickin zones. and I mad the mistake of buying 3 of these. waste of money had problems like this on 2 of the 3... they work fin and then you get smacked by some bug.
-

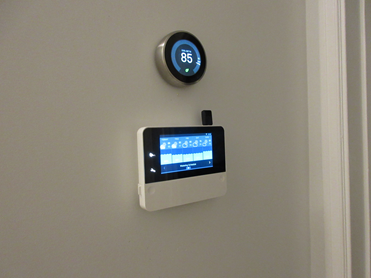
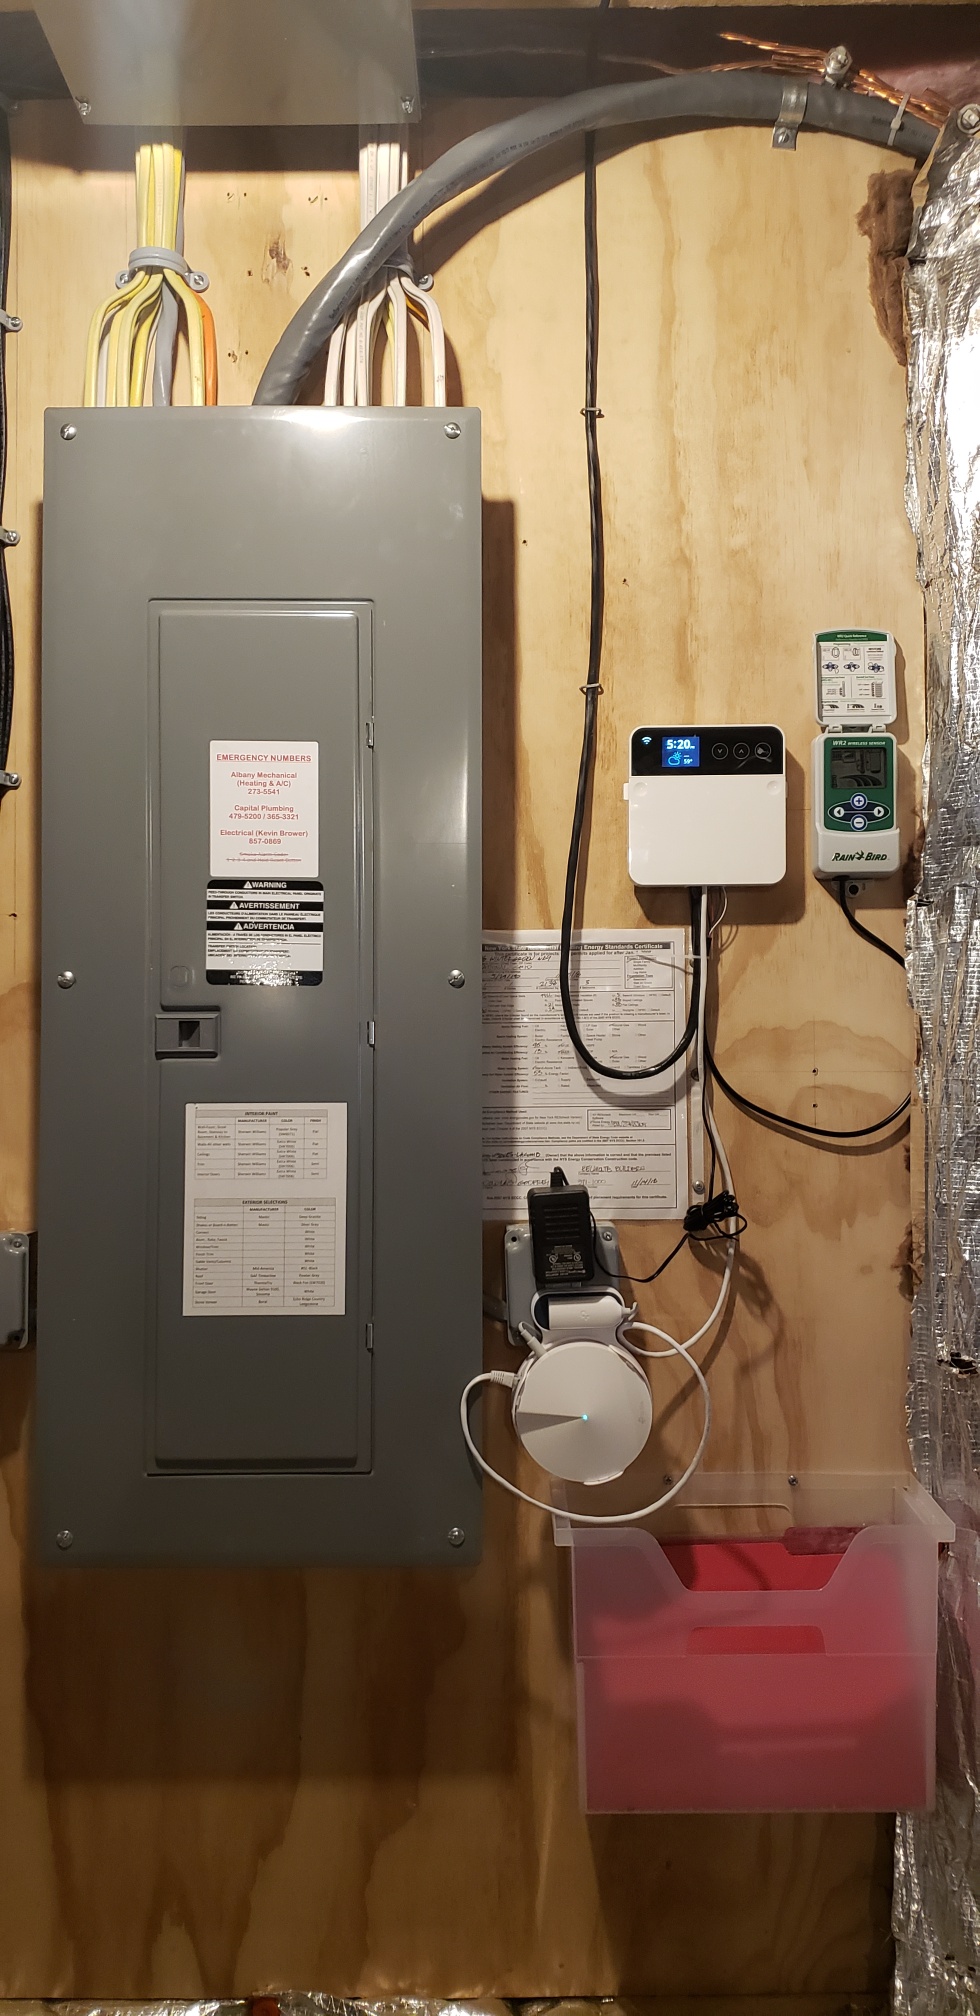
Mine is situated directly in the kitchen, managing the watering of the roofgarden which is one level up.
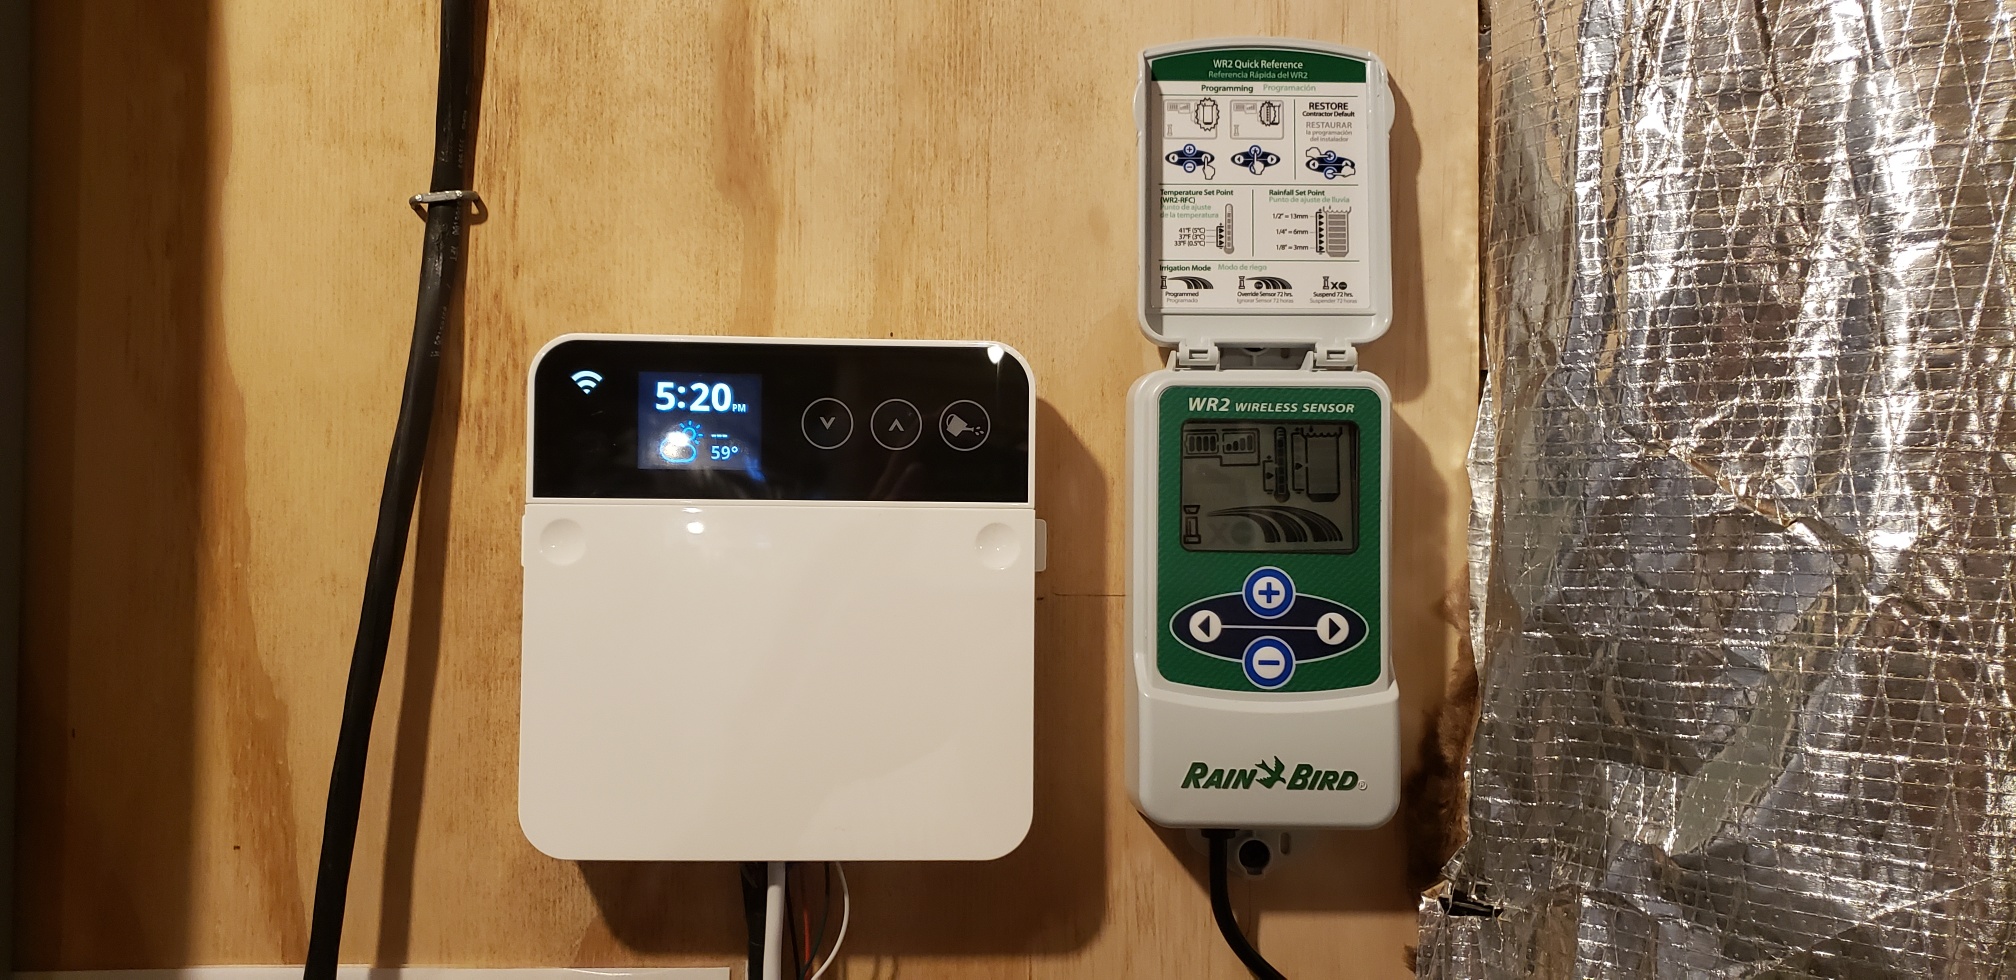
Replaced a Mini-8 with a Pro-8 just a week ago.
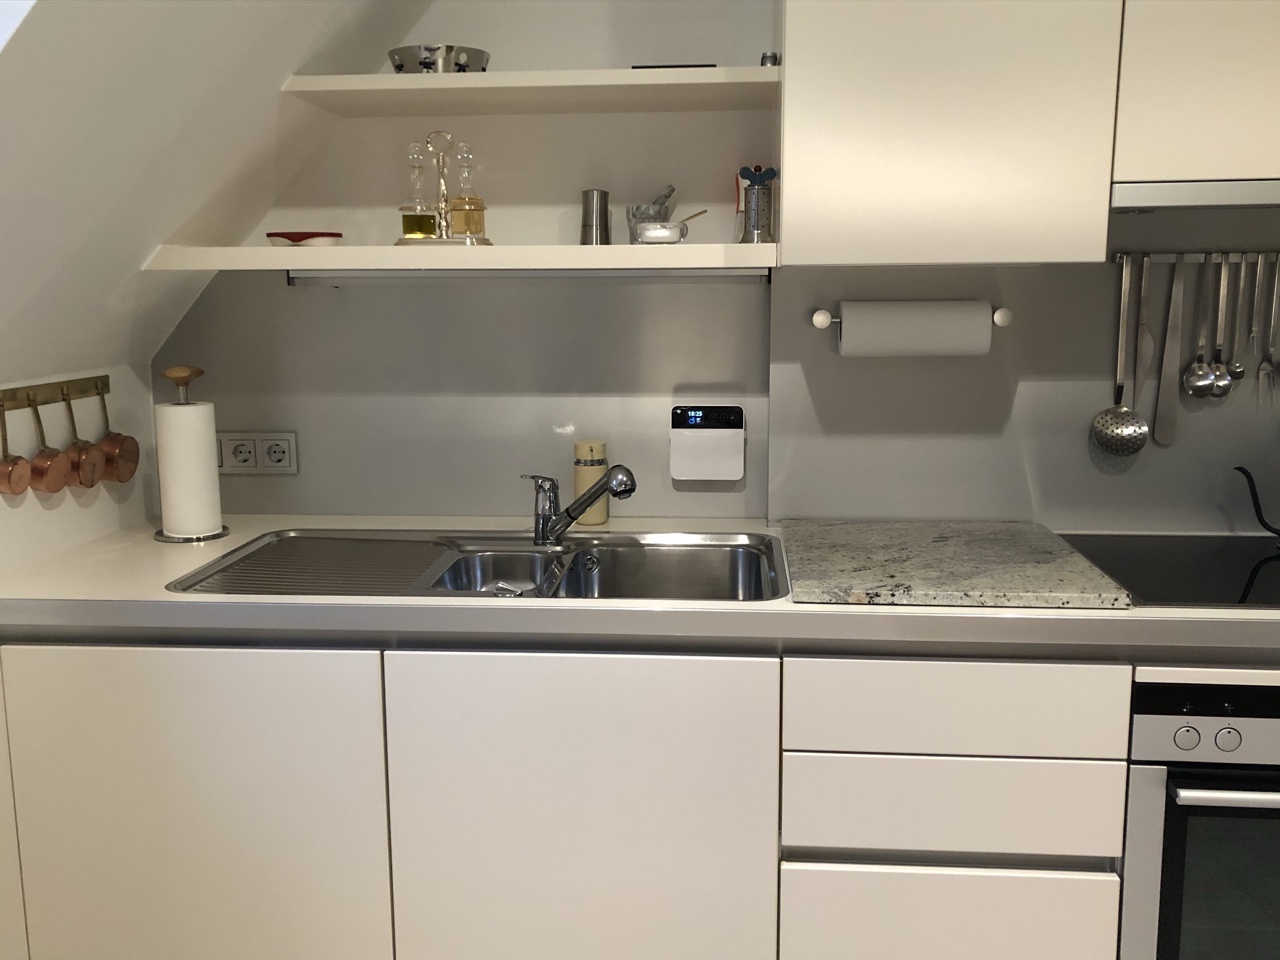
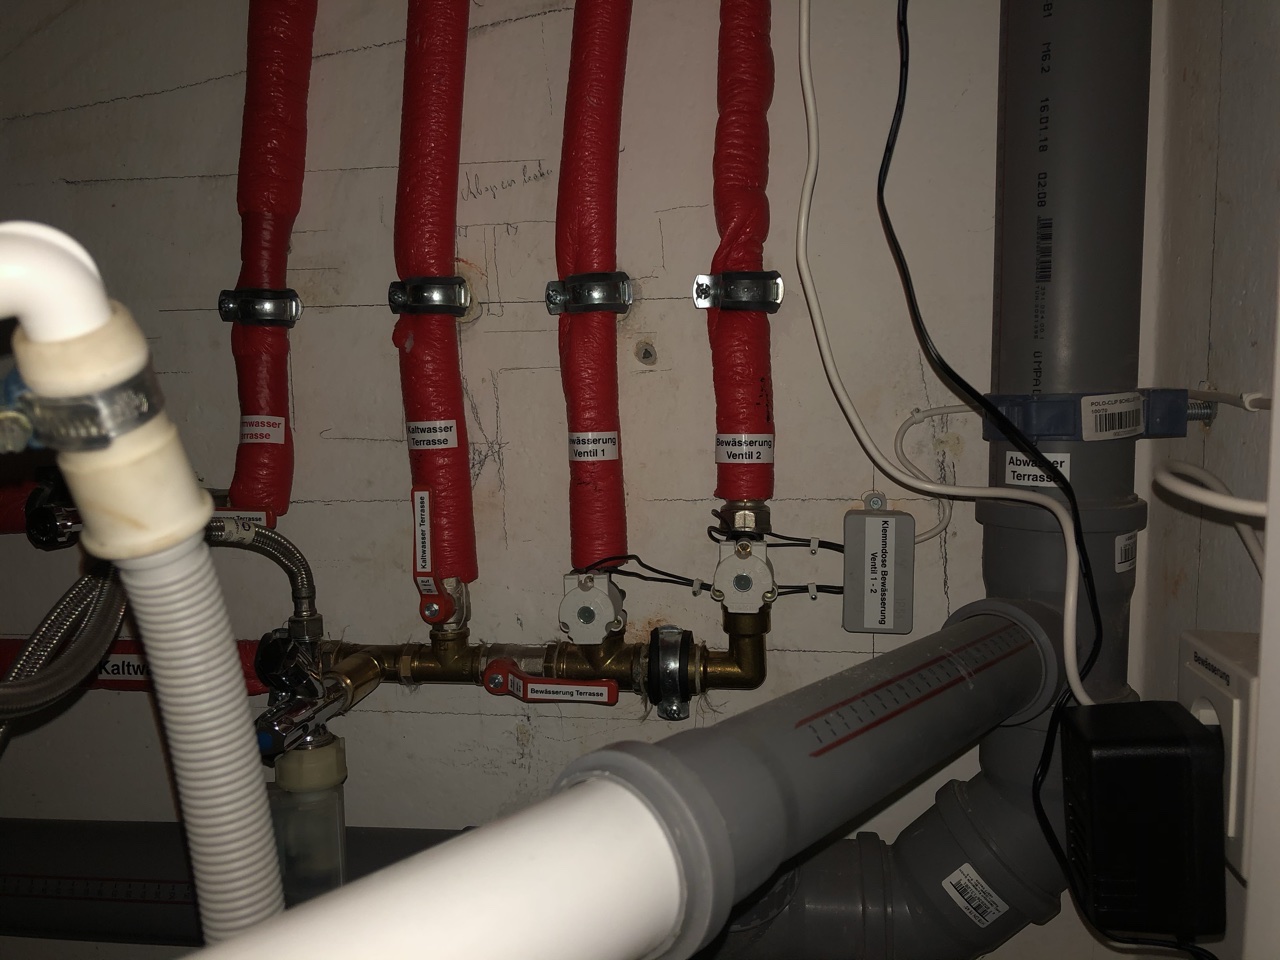
Cables, Power Adapter and Valves are in a space behind the „wall“ where pipes run through, accessible through the cabin under the sink or if you pull out the dishwasher on the left 😋
-

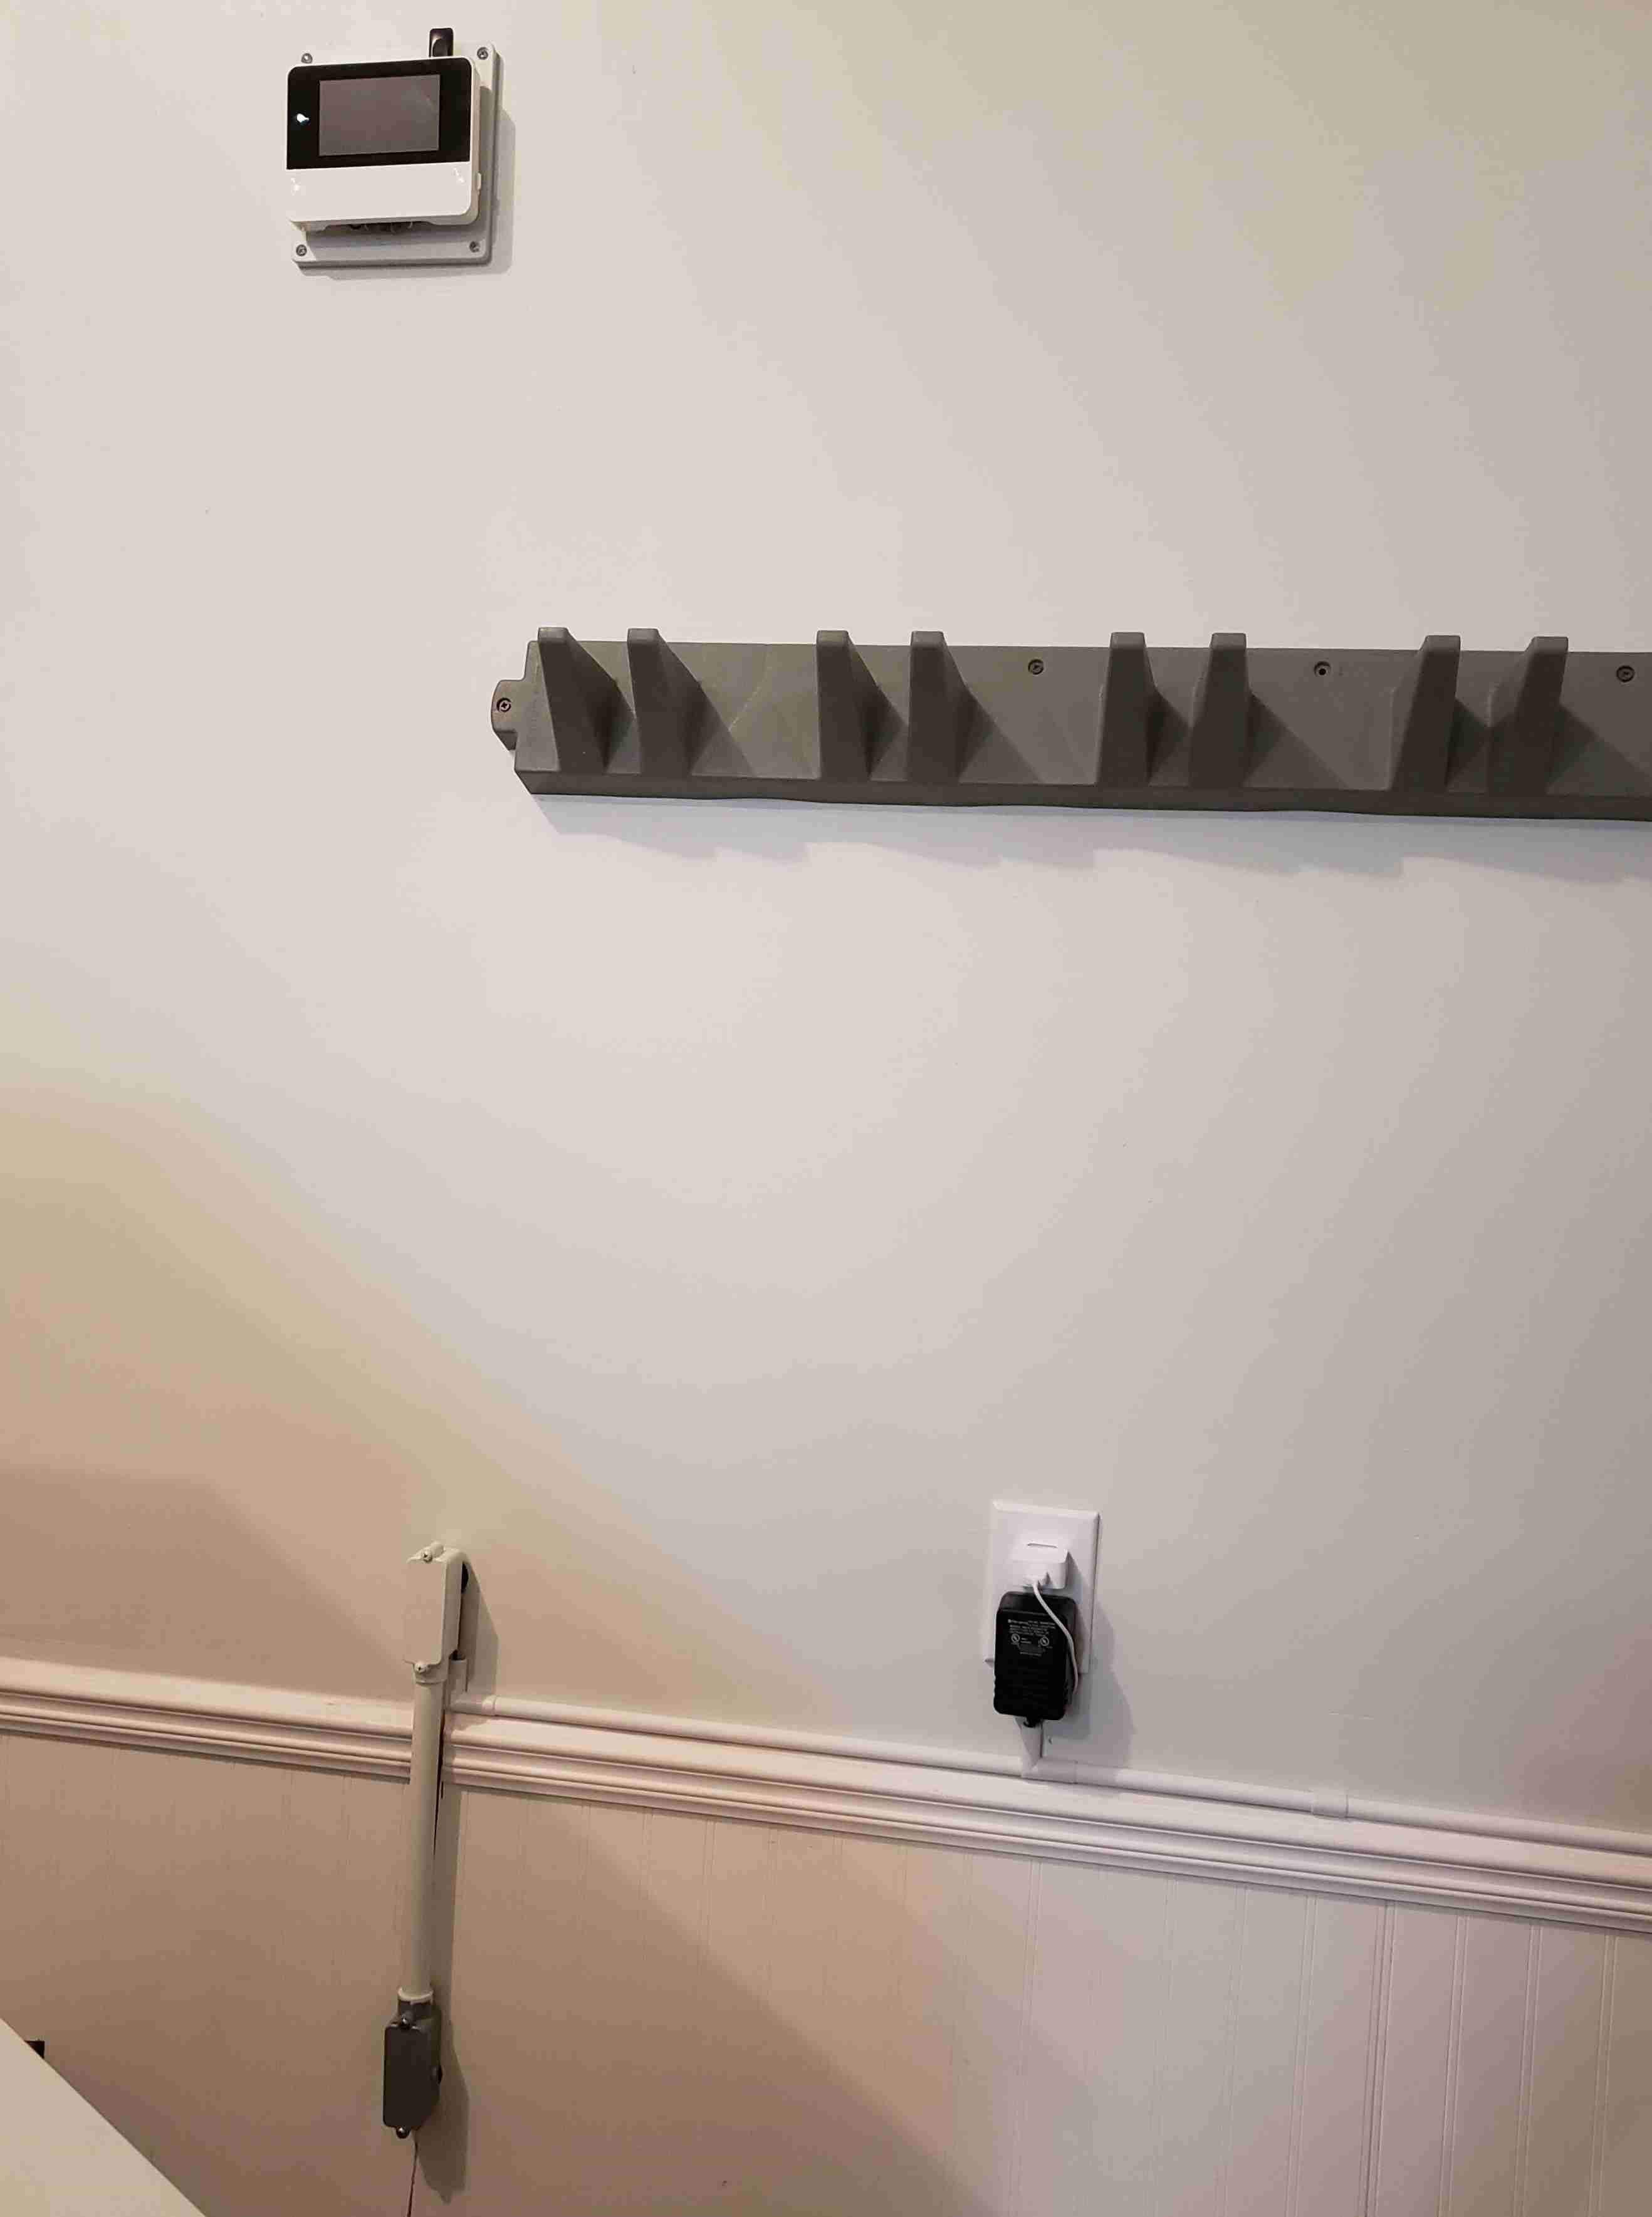
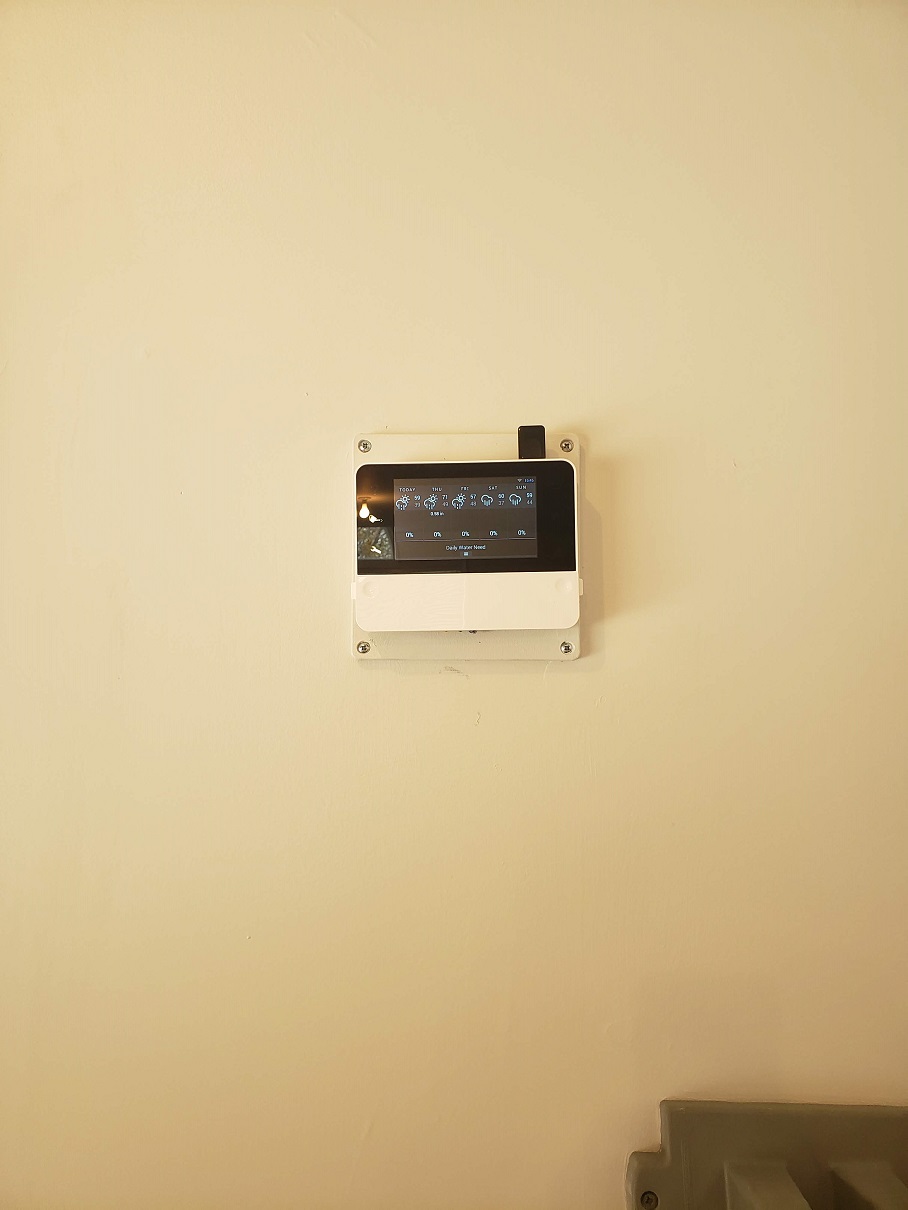
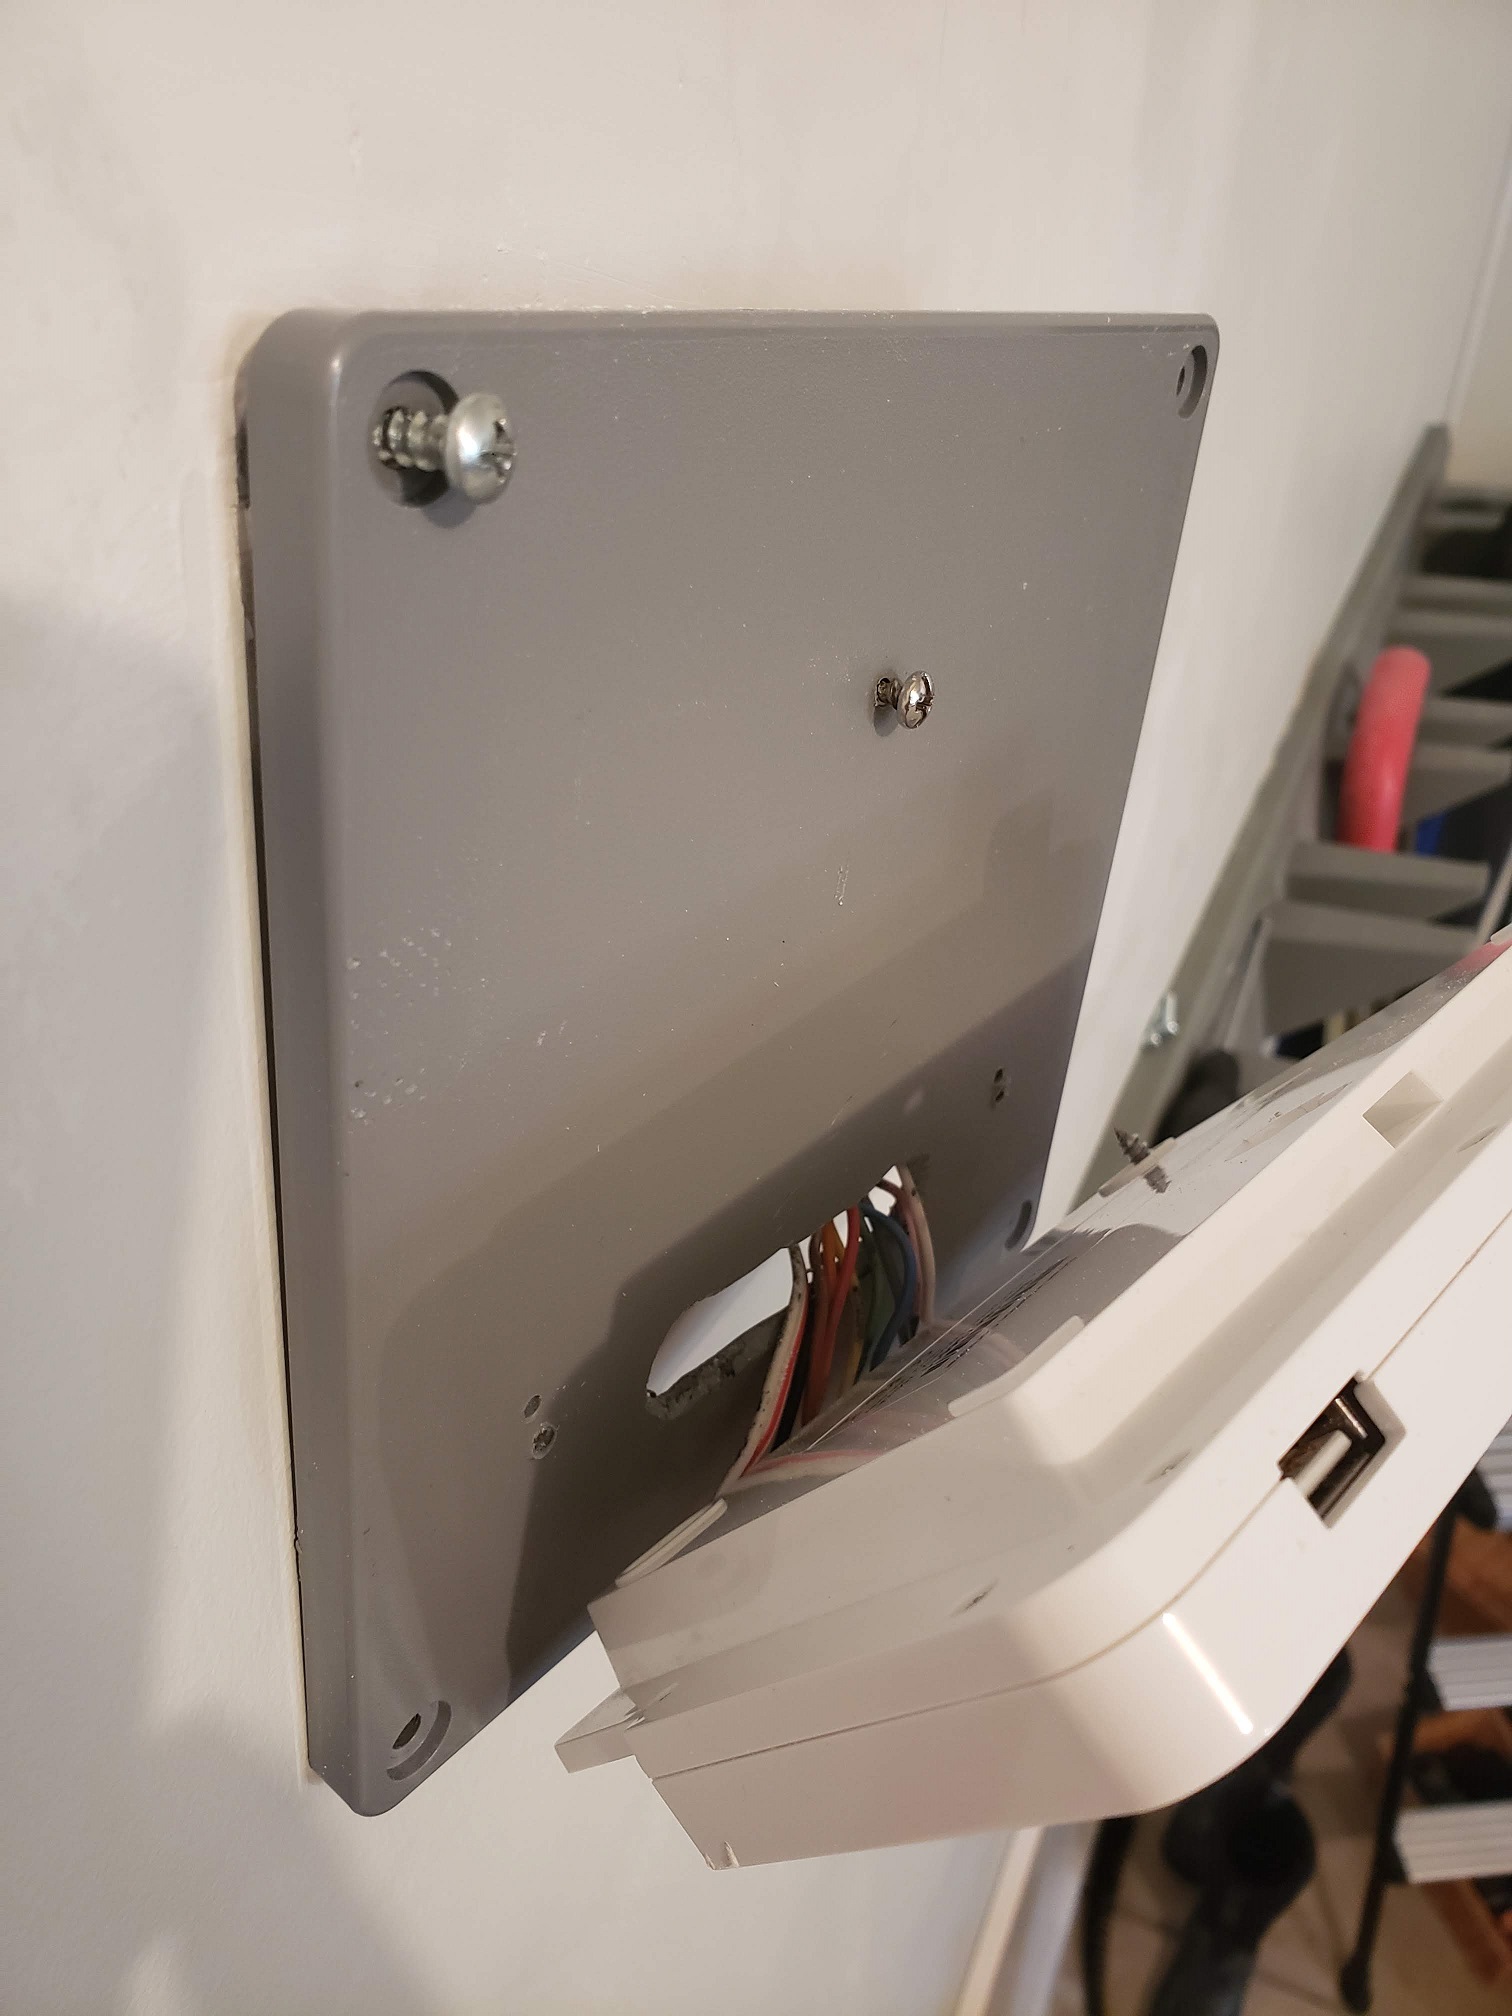
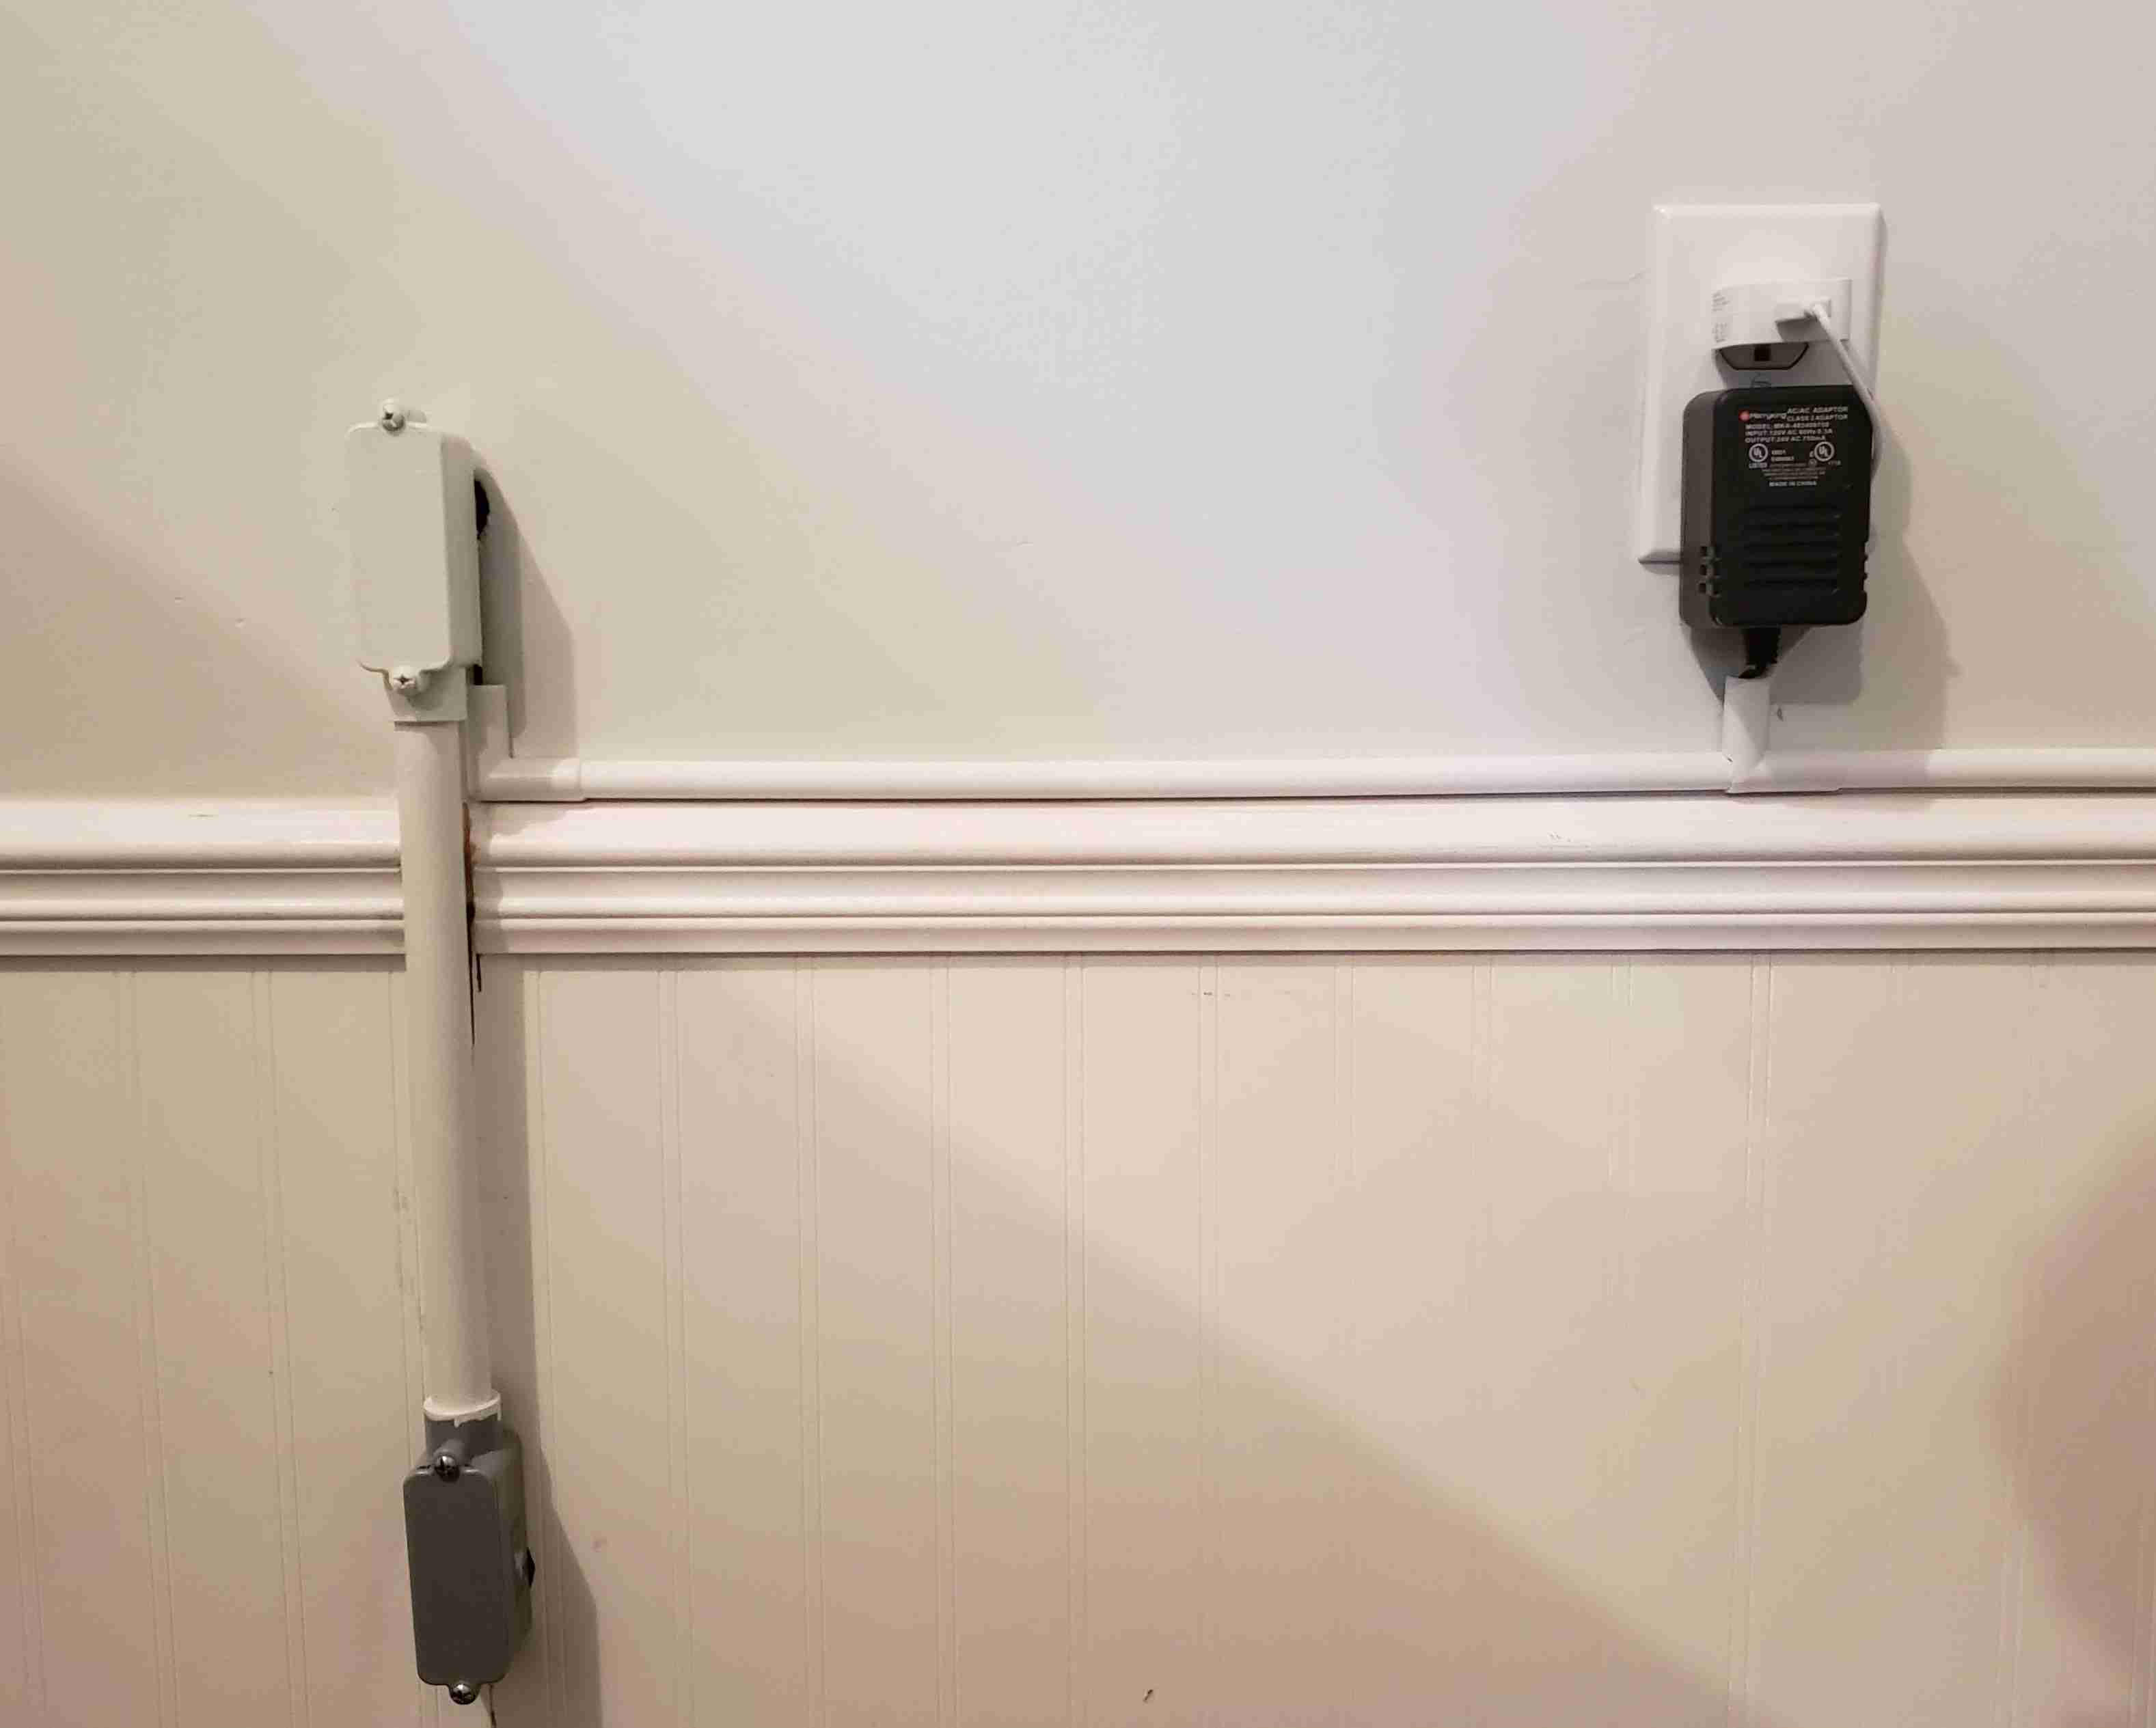
So, I wanted to replace three “dumb” controllers mounted at separate exterior locations in the front and back yard. I decided to install the RainMachine inside my home in a central hallway near my Wi-Fi router, but I wanted a clean install with no wires showing. I ran new irrigation wires from the valves under my home and up from the floor to a data closet. In the closet, I ran the wires through the wall using common coax cable bushings. For the other side of the wall where the RainMachine would be mounted, I modified the coax bushings by rough cutting the flange down and then grinding it down to about a 1/8 inch rim. The coax bushings are wide enough to allow solo 18/7 direct burial wire or 18/5 wire with the two power supply feeds.
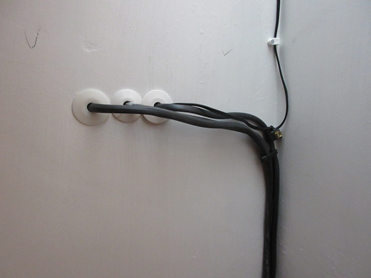
I ran new irrigation wires up from under house in closet and through wall with common coax bushings.

On the other side of wall I used same coax bushings but ground down the flange to about a 1/8 rim.
Bushings are wide enough for a solo 18/7 wire or a 18/5 with the two power wires (as in the bushing on the left).
I installed the unit right above the penetrations and wired it up.
Finish product looks clean with no baseplate needed.
-

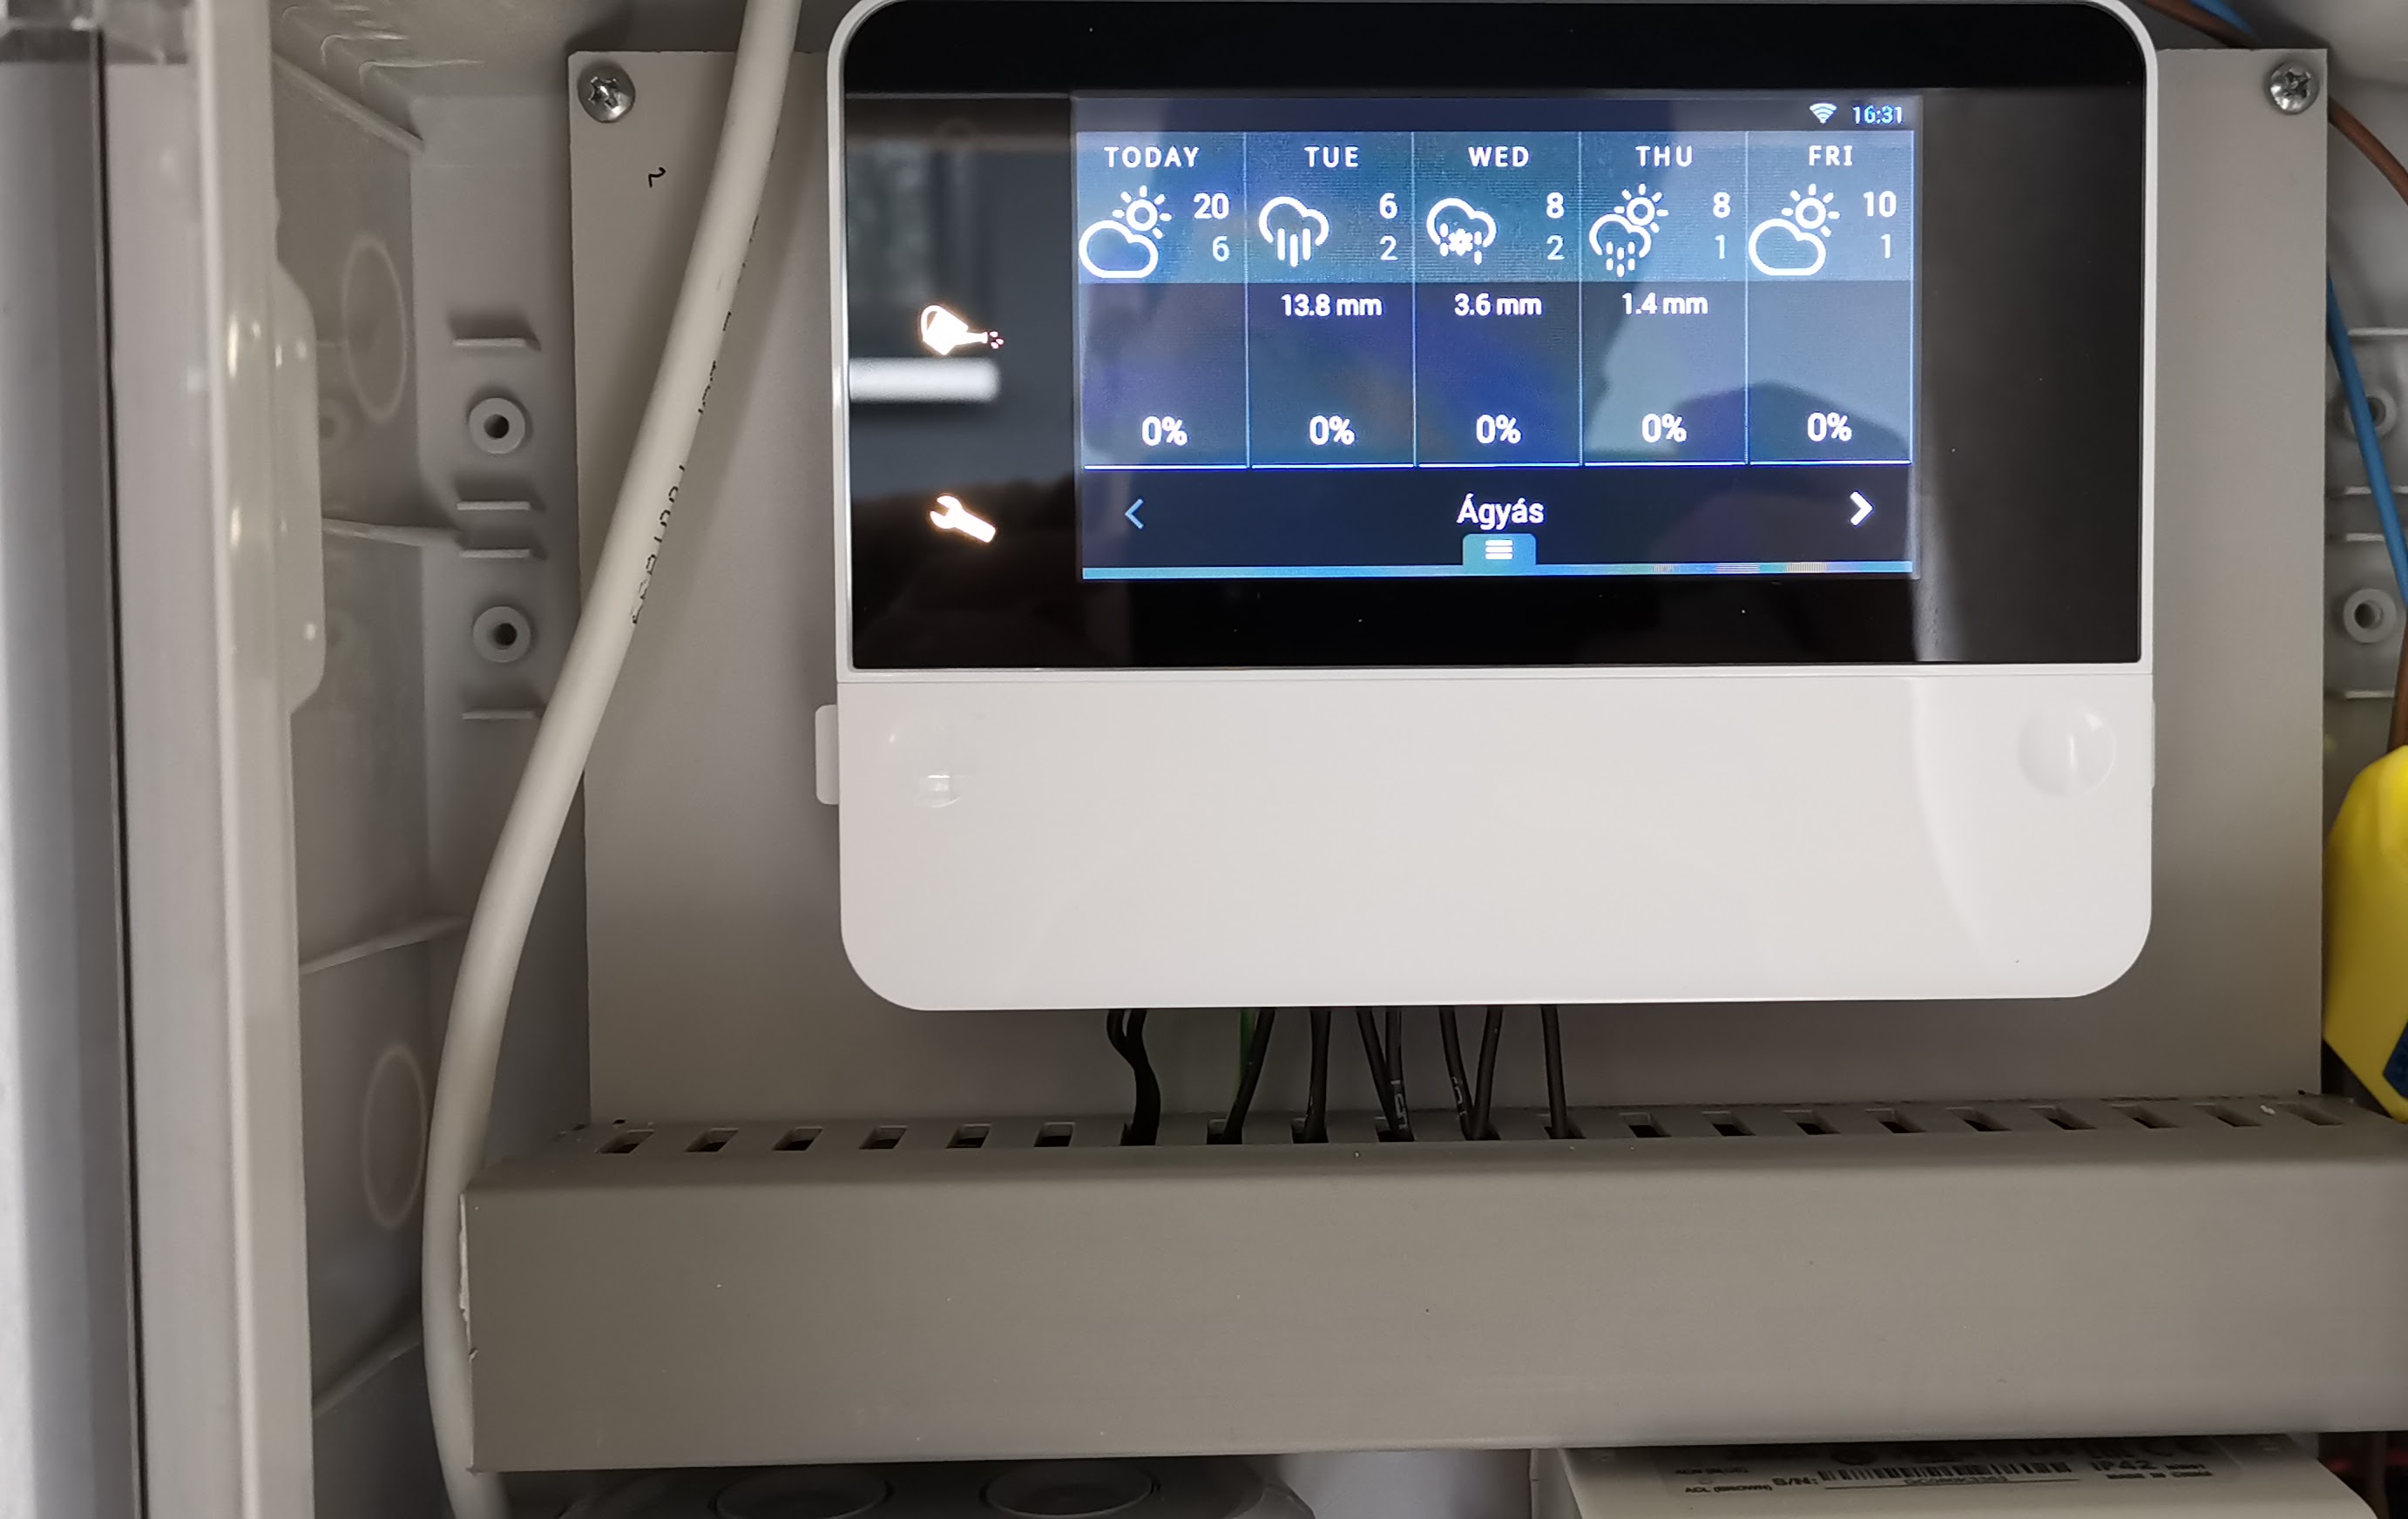
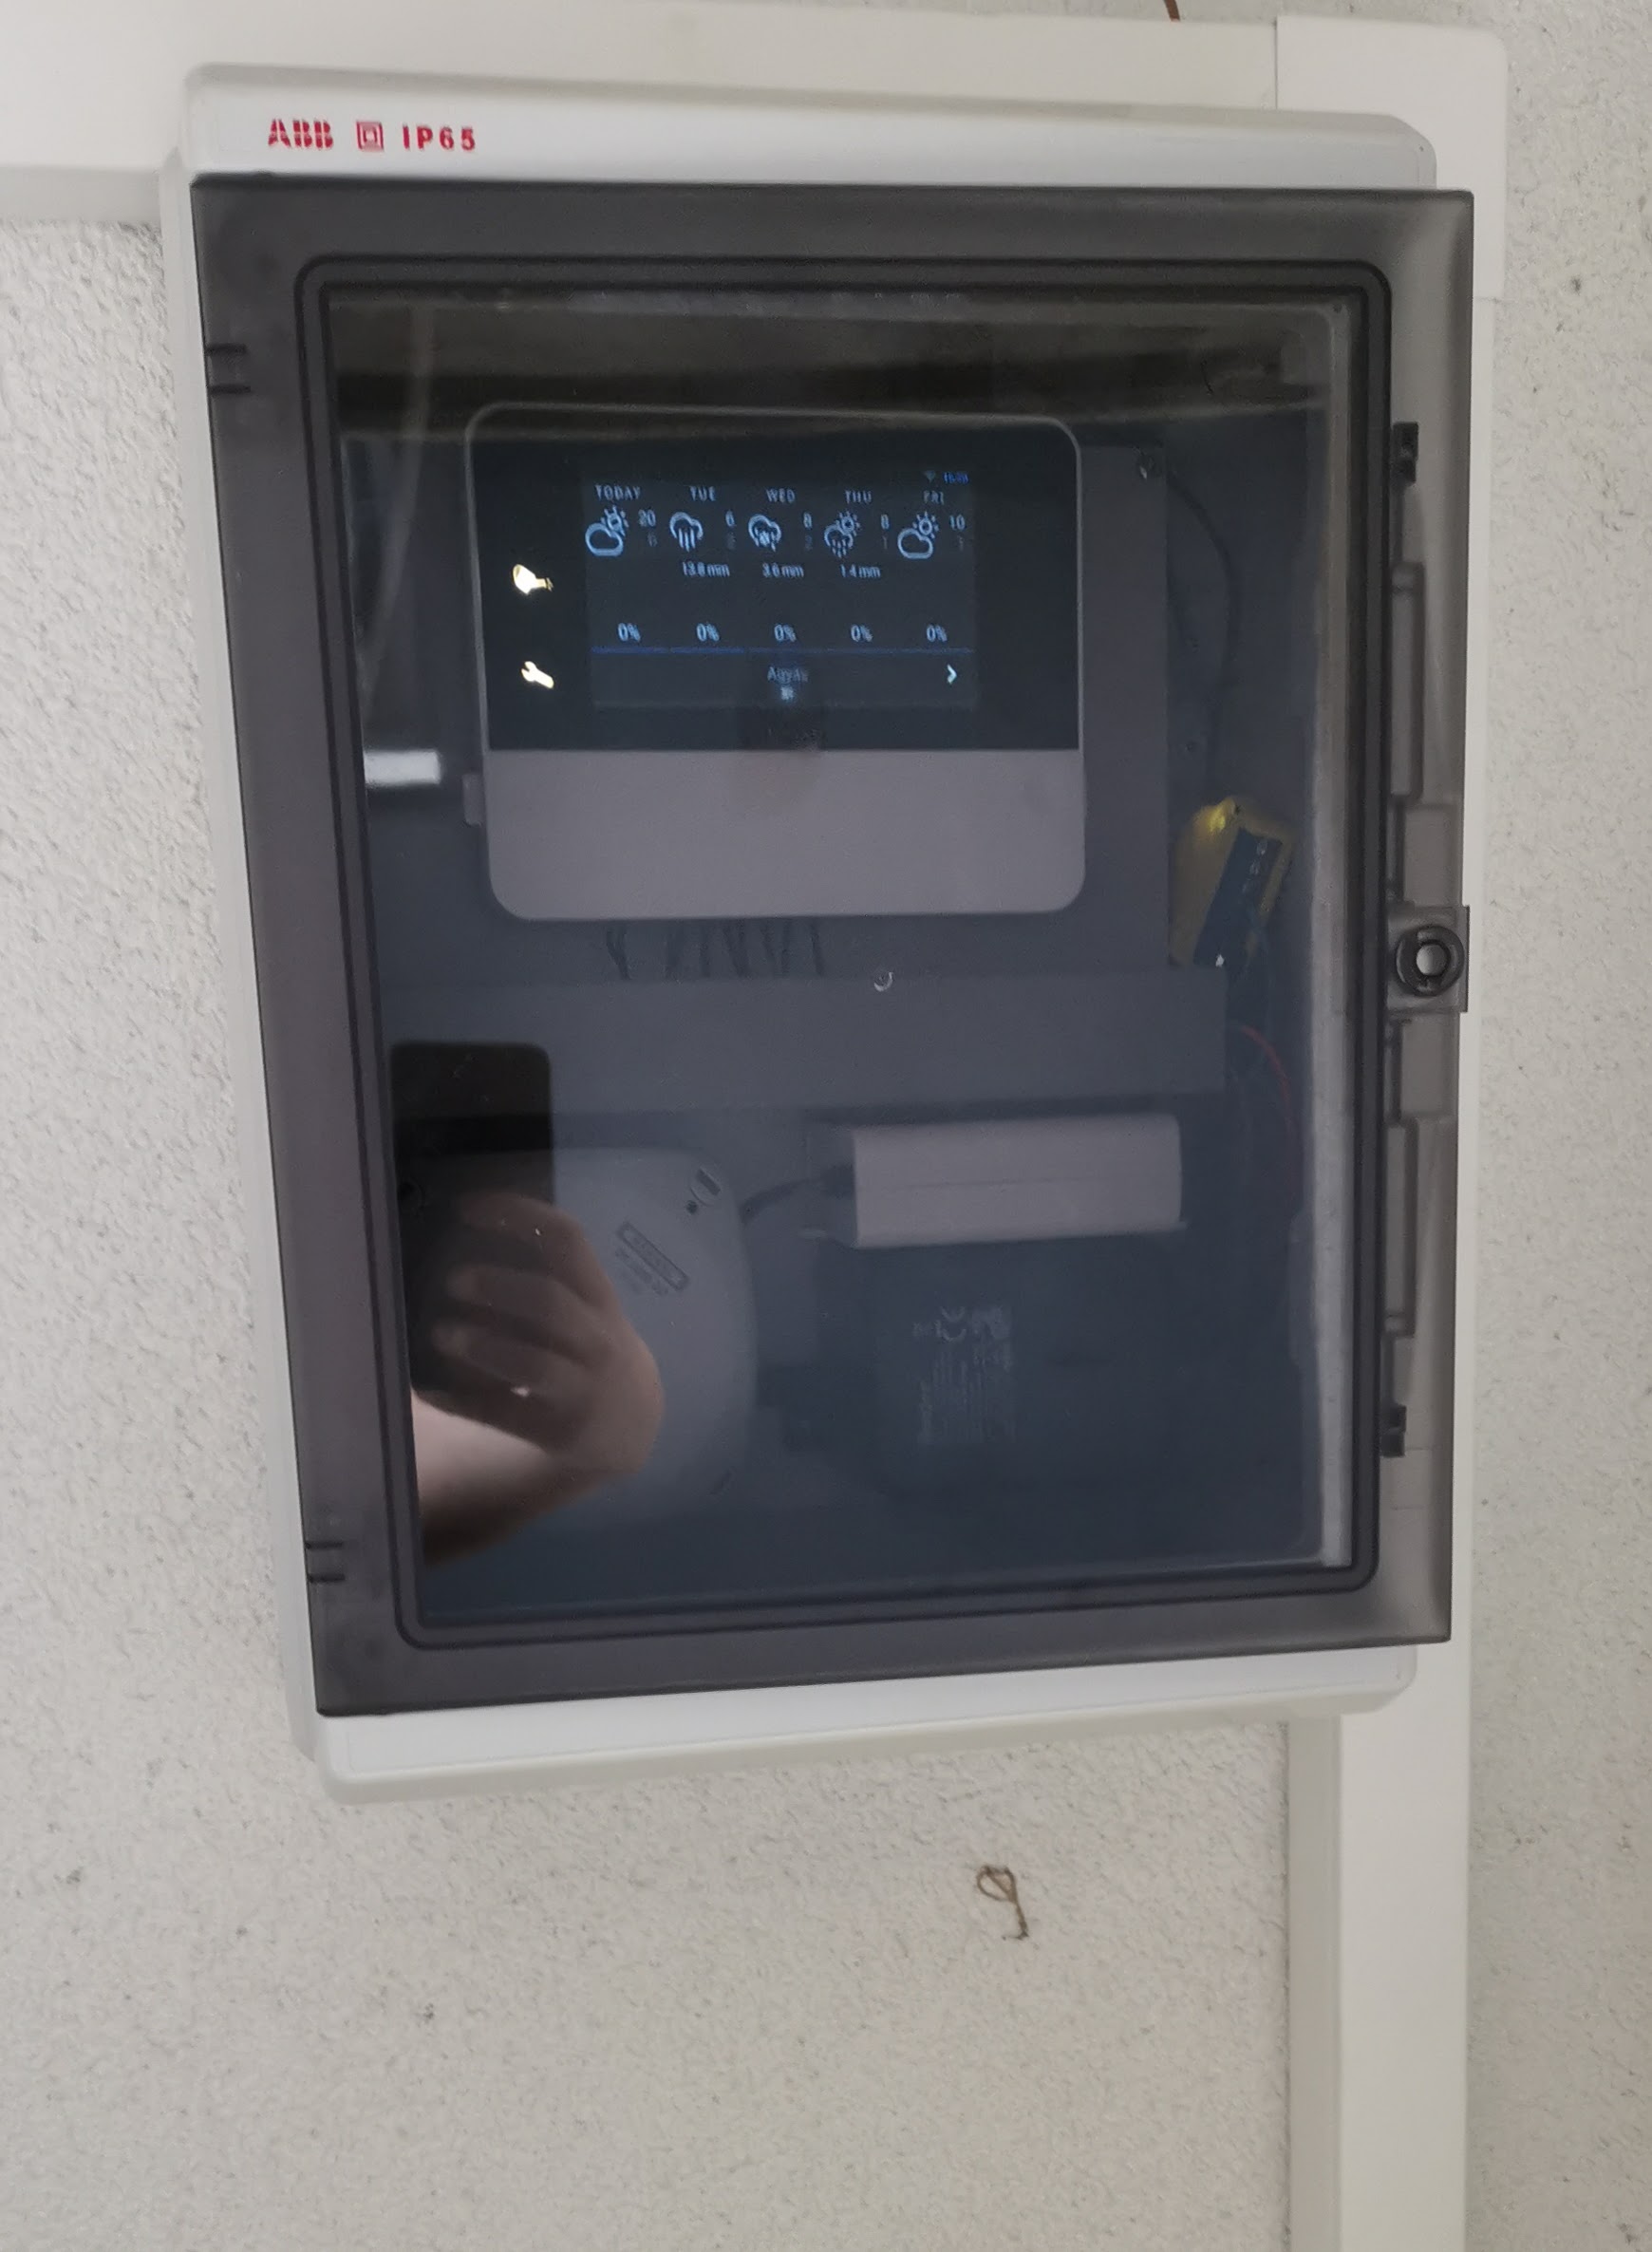
Here is my installation in Hungary. The rainMachine is placed in a ABB IP65 ceritified electrical distribution box, and fixed in a mounting plate. The installation is a bit messy because the cabinet also houses a shelly RGBW2 and a power supply for it. The high volatege is somewhat correctly separated from the LV side. The whole cabinate is mounted outside in a garbage bin storage building (Its a 1m by 2.5m building with a stone roof).

-

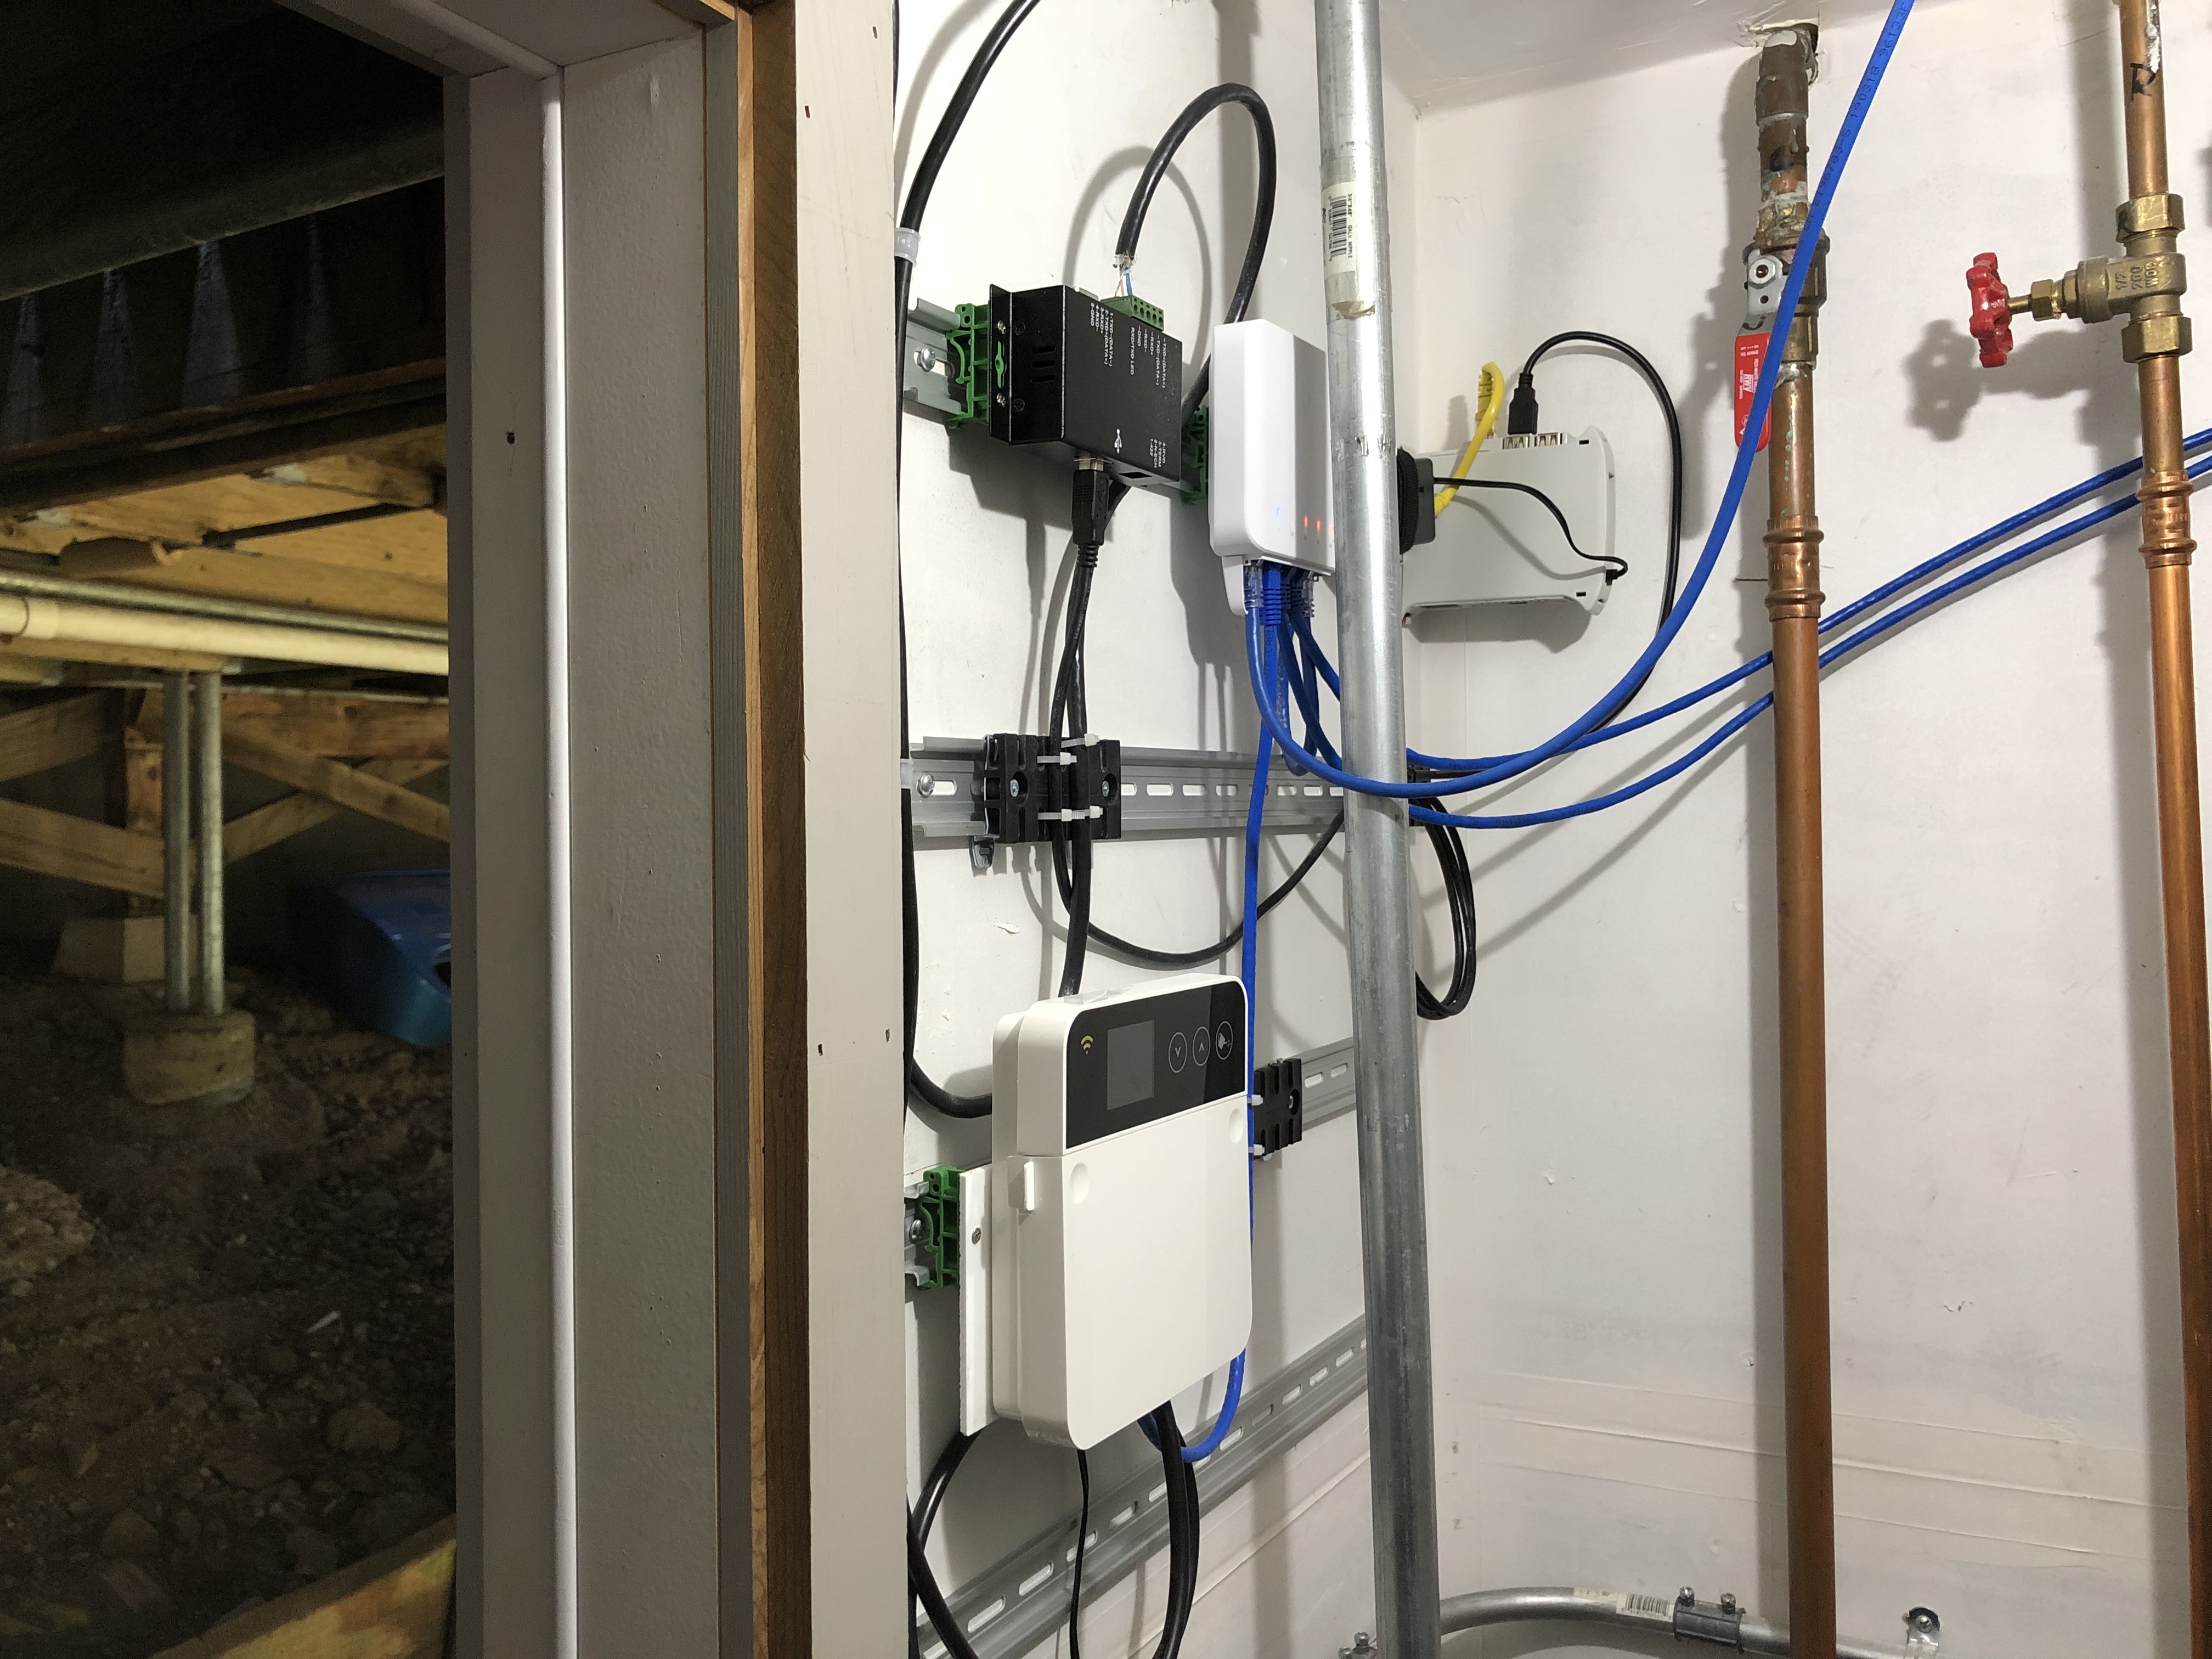
Just wanted to say that this thread has been super helpful. However, for future product designs, please consider how the unit might affix to DIN rail. The Pro-16 has two vertically-oriented screws, so either you mount the unit sideways, or you have to fabricate a mounting plate just for it.
-
Hmm, the adapter idea is great, but IMO this not need to be a separate product, maybe it can be placed along with the product, or a 3D model could be released to print out yourself.
Also the current mounting is great, the DIN rail adapter would be useful sometimes, but what happens if it is not the correct spacing in the distribution box.
I like to use mounting plate because it gives flexibility for positioning the device and gives a clean install just like Sebastian post in the first page, I be honest, that is the cleanest install i see here, with high quality Legrand distribution boxes and a proper mounting plate (original Legrand accessory for Plexo series cabinets)
-
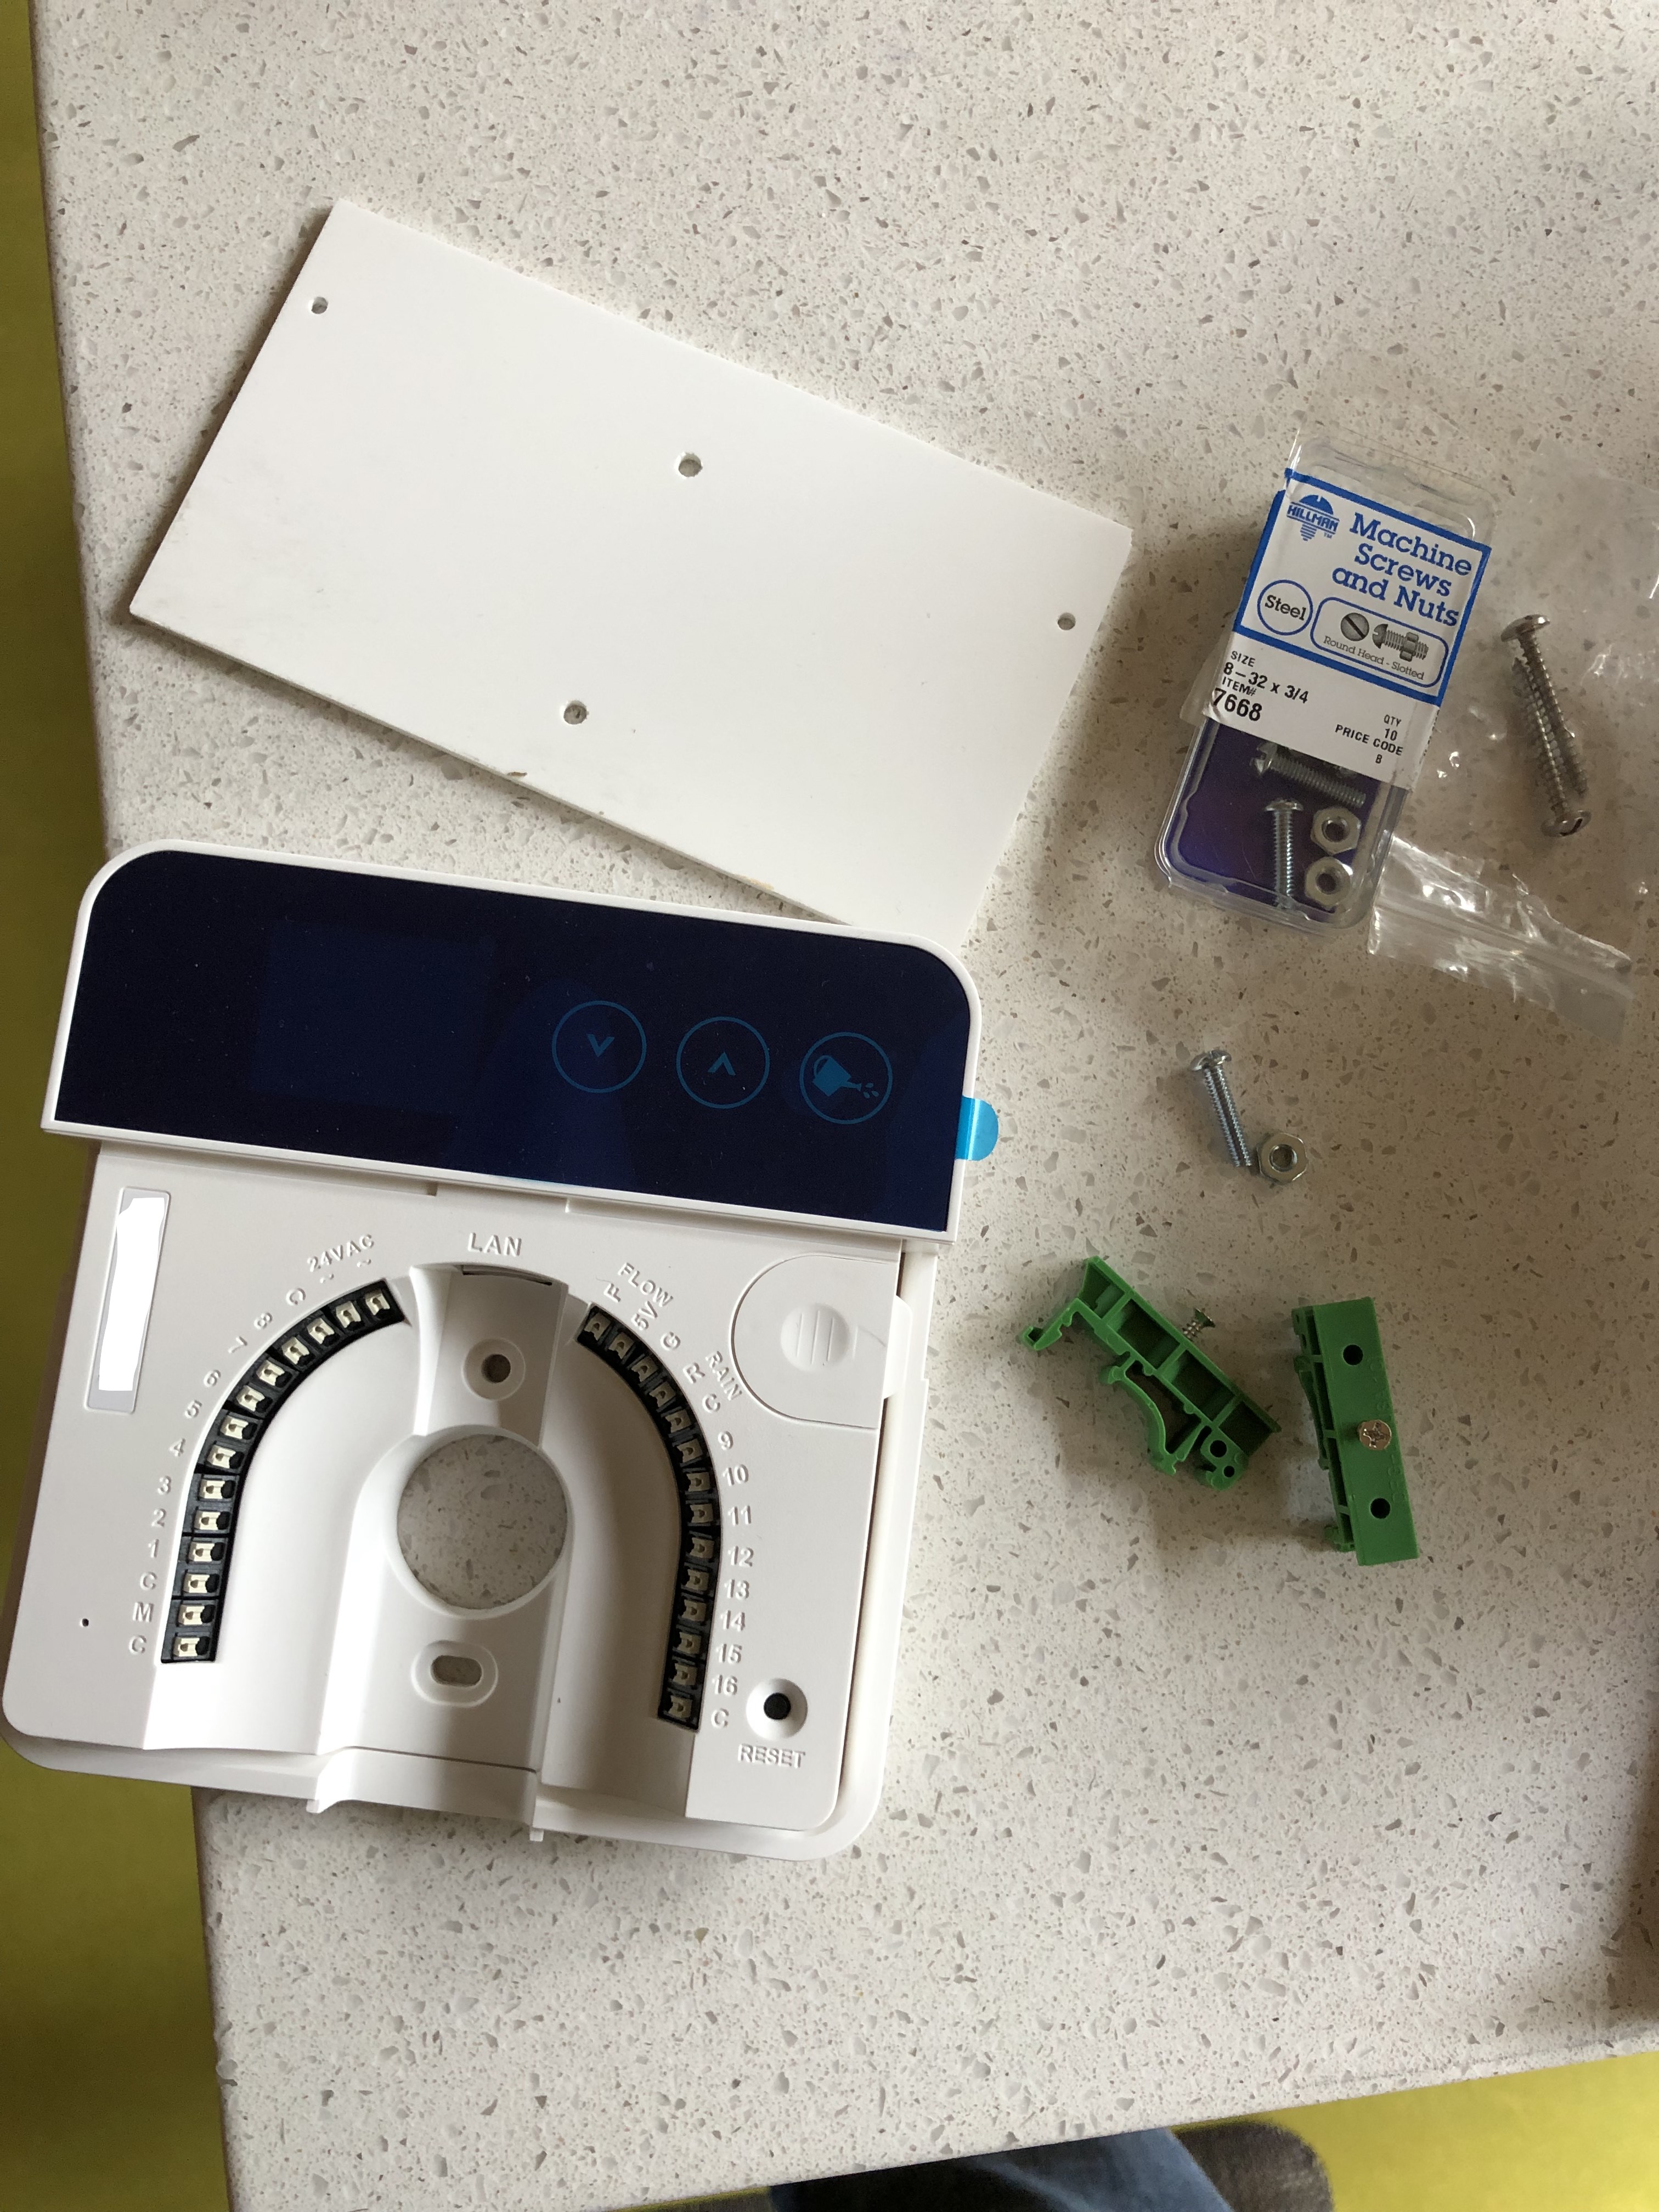
I ended up drilling some holes in a piece of white acrylic I had lying around and attaching it to some inexpensive DIN rail adapters I've used before.
Now I just need to find a suitable PoE adapter so it will run from the UPS.
I think going forward, the most useful thing is to provide mounting hole patterns and fastener specifications. (e.g. the two screw holes here may require different depth fasteners)


Please sign in to leave a comment.
Comments
46 comments